Digital thermostats can only function properly if they are linked to the internet. It auto-adjusts the heat and cooling inside the home. When users alter any wifi related settings, they often face issues connecting, and it’s really frustrating. If you are facing something, we got your back. Here is a complete guide to fix Nest thermostat can’t connect to WIFI.
Troubleshoot Thermostat “Failed to connect”
Quick Navigation
When users change their router’s options, then you’ll additionally have to adjust the WiFi options on the thermostat. Thus, it could keep the proper temperature in the house immediately. Nest Thermostat can’t connect to WiFi? Try These Fixes!
1. Wait a minute or two for your network to appear.
It’s possible that the WiFi connection is not displayed on the thermostat’s networking screen. The connection most likely appears after a moment or two. Even when it displays the first listing, the thermostat constantly searches for WiFi connections.
Remember: Regardless of where users reside, the connection might require a couple of minutes to show. However, this is particularly typical in areas with several WiFi connections. For example, residential property or a city area.
2. Restart the router.
You might have to restart the router for the connection to appear on the thermostat.
3. Pause around Sixty secs after removing the modem and router.
One might choose a complete functional modem and router or a different modem and router. Before that, ensure to remove both gadgets. Remove the complete modem and router system and pause for at least Sixty sec. After that, reconnect it.
Remember: When users own a different modem and router, switch on the modem and allow it to start again for a minimum of thirty sec. Next, connect the router. Also, give yourself a couple of moments before attempting to connect the thermostat again.
4. If your network is hidden, type in the name.
One has to individually input the title when the WiFi connection is hidden (the router is enabled not to display the identity or SSID).
Write the connection title or select an alternative connection from the range of networks. Make sure that you have the password or pin in hand when connecting to the hidden network.
5. Test WiFi with another device
This method would assist users to identify the problem. When they can’t access the WiFi connection after starting the router again. Attempt linking to the WiFi connection with some other gadget.
Such as a phone when you’re near the Nest Thermostat. If the other gadget cannot connect to the network,
you can say that the router is either excessively distant from the thermostat or has an issue. Consider shifting the router nearer to the thermostat. The additional repair could be done by:
- Consulting the router’s handbook.
- Contacting the company.
- Internet Service Provider (ISP).
6. Test with a WiFi hotspot
Utilize a second device (or a laptop with mobile data) to link the thermostat like a hotspot. When the thermostat could join the hotspot, the WiFi connection may be down.
To solve problems, go to the router and verify the WiFi router options. Hotspot connections are not advised for smart home devices like thermostats for over an extended period.
7. Restart your thermostat
When you are trying to set up, you could avoid the WiFi connectivity phase. Further, proceed to the installation. After that, one could consider reconnecting the thermostat by starting it again. The following are the methods to restart your thermostat. Depending on which model you have:
8. Nest Thermostat
- Click the Nest options button on the thermostat and choose Start again.
- Tap the Home application to reconnect after the thermostat has completed rebooting.
9. Thermostat E and Nest Digital Thermostat
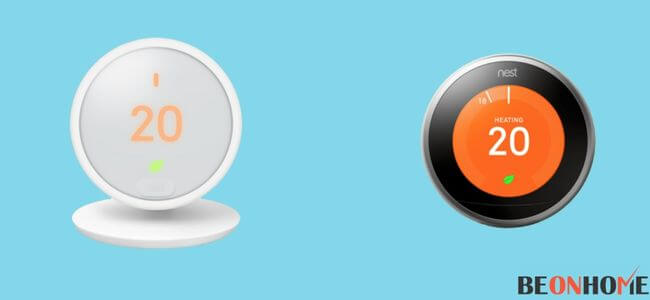
- Click the Nest options button on the thermostat, Hit Reset, and Start again.
- Once the thermostat has started again.
- Then, navigate to the Nest options button.
- Select Network, and attempt connecting once more.
- Check for wireless interference.
Several devices may be conflicting with the thermostat’s capability. To connect to the WiFi connection. Switch off any 2.4 GHz gadgets that could create wireless interference for the time being.
These are a few examples of 2.4 GHz gadgets:
- A smartphone that does not require a wire.
- Sensors for babies.
- Microwaves.
- Bluetooth-enabled gadgets.
- Camera devices that can be used wirelessly.
After the potential gadgets have been turned off, reconnect the thermostat to WiFi. Remember, when users have a Nest Smart Thermostat third generation, initially attempt linking to a 2.4 GHz connection. If that does not work, attempt the same using a 5 GHz connection.
- Reset your thermostat’s network connection
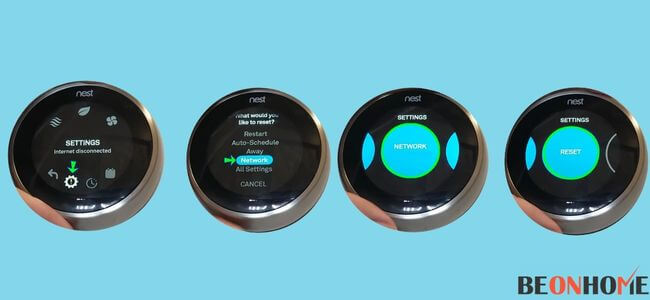
If you are still having trouble joining after starting the Nest thermostat. Attempt resetting the network connectivity from the Options menu and reconnecting it.
- Check your WiFi router settings.
Attempt activating the 2.4 GHz WiFi connection on the router. Over greater distances, 2.4 GHz can provide more vital connectivity than 5 GHz. For directions about how to accomplish this, consult the handbook for the router.
For further router options to examine:
- Visit the suggested WiFi.
- Network options post.
10 For additional troubleshooting, one could also:
- Consult the router’s handbook.
- Get in touch with the company that made it.
- The ISP.
How do I fix Nest error w5?
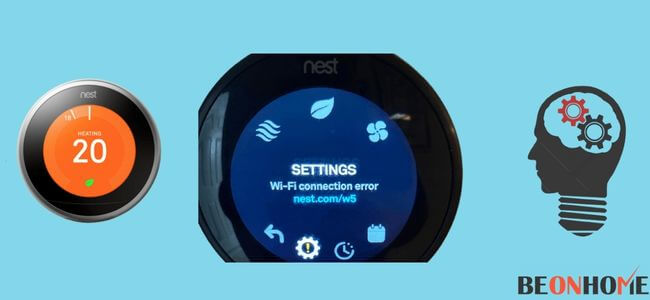
1. See if there’s a W5 notice
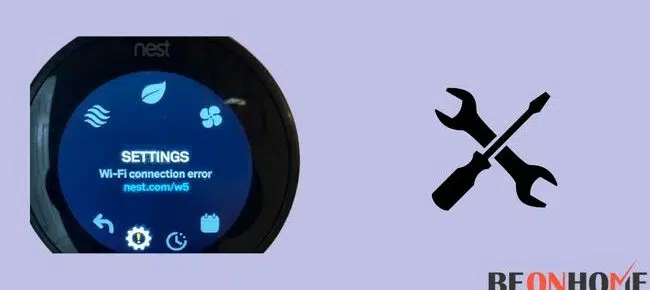
When you get the W5 notice, you can verify the network option on the thermostat to see if the W5 error has happened.
a. To access the Quick Look option, click the thermostat circle.
- Click the Settings button in the Nest.
- Flip the ring till you see Network. You might receive a notice like this: “Error – nest.com/w5.”
- If you see “We’re not linked.” This isn’t a W5 error at all.
b. Start the thermostat again when a W5 code appears.
When the thermostat is down or has occasional connection troubles, there is no W5 message. Then, follow the methods for repairing WiFi and connectivity problems discussed above.
2. Turn the thermostat back on
When you start the thermostat again, none of the personalized data or parameters are deleted. You could utilize the thermostat as usual after it has booted up. To access the Quick Look option:
- Tap the thermostat button.
- Navigate to the Nest Options symbol.
- Choose Reset.
- Press Restart.
Users could attempt reconnecting their thermostat to Wi-Fi once it has started again.
- Click on the Nest options tab on the thermostat.
- Select Networks.
- Pick the title of the WiFi connection.
3. Get in touch with customer service.
- When the W5 error message remains, please call Google Nest client care for assistance.
- Whenever you contact, keep the assistance number as well as the identification code of the thermostat prepared.
- Look at the bottom of the thermostat to obtain the thermostat’s identification code.
- On the backside of the screen, the identification code is located above the Barcode.
- Speak with an assistant. Tell them you’ve gone through all the technical methods to fix the issue.
How do I reset my Nest thermostat Wi-Fi?
To access the Quick Look option, tap the thermostat circle:
- Choose the Settings button in the Nest.
- Click Reset by flipping the circle.
- Choose Network.
- To agree, click Reset.
Why won’t My Nest thermostat connect to App?
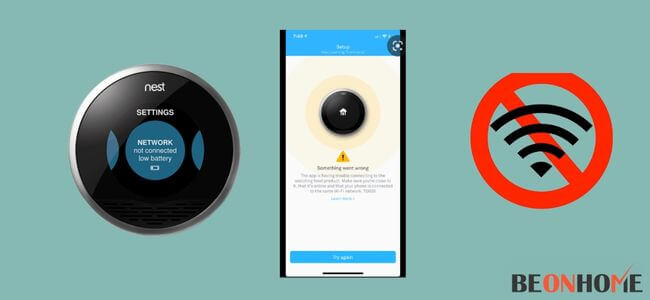
1. Verify that the internet connection is operational.
Ensure you can connect to the internet from another gadget in the house. When users check the connectivity using a smartphone, ensure that you’re not utilizing mobile service. Switch on WiFi after putting it on Flight mode to see if the connectivity is functioning.
When you’re having trouble linking, attempt an alternative gadget to check twice. When neither gadget can link, verify with the internet service provider (ISP) to see if connectivity is available in the region.
2. Verify the application’s edition.
On the smartphone or computer, ensure that users have the recent version of the Nest or the House app. They are available for installation through the Play Store.
3. Start your thermostat again
For this, you can follow the steps that we have mentioned above.
4. Start the router and modem again
A restart may be required to reconnect it. For this, you can follow the steps that we have mentioned above.
5. Examine the WiFi router or connection point options.
- Switch on the 2.4 GHz WiFi connection on the router.
- At extended distances, 2.4 GHz could provide more robust connectivity than 5 GHz.
- The first and second generations of Nest Smart Thermostats exclusively function along with a 2.4 GHz network. Thus, make sure it’s switched on. 2.4 GHz.
- 5 GHz channels are supported by all major Nest thermostats.
- More repairs could be done by consulting the router’s handbook. Or consulting the router’s owner or ISP.
FAQ
Why isn’t my Nest connect connecting?
The Google Nest thermostat might not be suitable for the type of network or router type. There are some good smart thermostats with Wi-Fi connectivity for multiple zones you can choose from.
Why won’t My Nest thermostat connect to the app?
The apartment’s WiFi router or accessible connection has inappropriate options.
Why won’t my Google Home connect to WiFi?
There might be the following reasons:
• Router with a weak connection.
• Low-speed online connectivity.
• A modified internet passcode.
Final Talk
When the Nest thermostat isn’t quickly linking to the WiFi, one should know what’s incorrect and, more significantly, what one could do to repair it. Get your Airbnb a good wireless smart thermostat with wifi connectivity.

Leave a Reply