If you don’t know what an isp DHCP is, it’s short for Internet Service Provider dynamic host configuration protocol services. That means it assigns your computer an IP address and other network information.
Lately, most clients are having trouble with their ISPs’ DHCP. Some users can’t connect at all, while others can only connect to websites with domains.
If you facing something similar, then we got you a step-by-step guide on how to fix Your ISP’s DHCP That Does Not Function Properly.
Fixing Your ISP’s DHCP Does Not Function Properly
Quick Navigation

If you’ve been working on your router at home and have noticed that the DHCP service isn’t functioning. your router has said, Don’t worry! You can fix this issue pretty easily.
- Step 1: Set your DHCP query frequency to Aggressive.
- Step 2: Restart your router.
Now, The DHCP Query Frequency setting tells your router how often it should. check to see if an IP address has been assigned to it.
As the frequency is set to Aggressive, your router will check for an IP address. it may solve the problem you’re experiencing. if your router has been trying to get one assigned without success.
If you’re still having issues after trying both of these things. you can also try these little steps:
- Step 1: Disconnect all devices from the router, including computers, tablets, gaming systems, etc.
- Step 2: Unplug the power cord from the router, wait 20 seconds, and plug it back in.
- Step 3: After the router starts up again (usually takes a few minutes), connect all of your devices back to the router.
- Step 4: Restart your computer.
- Step 5: If the problem persists, unplug the cable connecting your DSL modem to the phone jack and leave it disconnected for 10 seconds before plugging it back in. Wait another minute or two for the internet connection to reset, then try again to access a webpage.
- Step 6: If your cable modem has a reset button, press it and wait 2 minutes while it restarts.
- Step 7: If you have a Wi-Fi network set up, try plugging into a wired Ethernet connection instead. A faulty Wi-Fi signal might be causing your browser issues.
How Do I Fix A DHCP Failure On My Router?
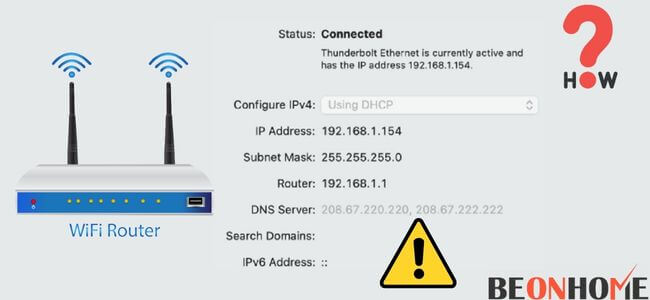
This is a complete and comprehensive guide to fixing a DHCP failure on your router. It provides step-by-step instructions for resolving the issue. by using commands and all other troubleshooting techniques.
All you need to do is follow the following steps:
- Find the IP address of my wireless router. Firstly, I need the IP address of my router. It is pretty easy!
- Step 1: Open the Command Prompt on your computer.
- Step 2: Type “ipconfig” into the command prompt. Hit enter.
- Step 3: The IP address you need will be listed under “Default Gateway.”
- Find the password for my wireless router. Then I searched for the password of my router. In order to find it, you have to access your router’s configuration page. Once you’ve accessed the configuration page, you can find the password in the Wireless section of the page.
- Log in to my wireless router using SSH and verify that I can ping 192.168.0.1;
- Log in to my wireless router through its web interface and find the DNS settings;
- Change the DNS settings to 8.8.8.8 and 8.8.4.4;
- Save the new settings on my wireless router and reboot it to ensure that they work;
- If they do not work, contact customer service for help fixing this issue.
What Does This Error Mean?
This error means that there was a problem with the image, and it may have been deleted by accident. The image may be missing an essential file, or the file may be corrupted.
If you do not see the error message below, it means that the file is present in the cache, but it is not on your hard drive. If this happens, try downloading it again from our website.
What is better, DHCP or static IP?
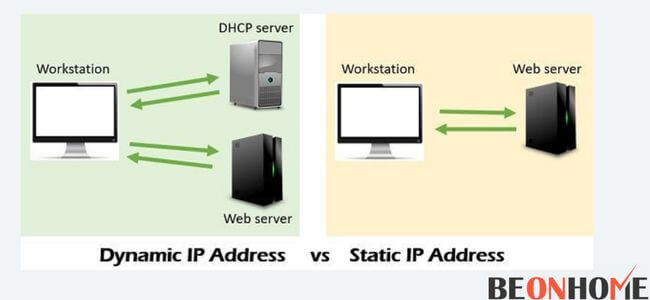
Static IP addresses are the most common way to assign computers a unique address on your network. This means that each computer on your network will have its own address, which is useful for maintaining a consistent look and feel for your network.
On the other hand, DHCP allows all computers in your network to share an IP address via a central server. This can be handy if you have several devices with similar needs and want them all to share resources like DNS information or other configuration settings.
Should DHCP be enabled on modem and router?
DHCP is a protocol used to assign IP addresses and other network configuration parameters for hosts on an IP network. It can be enabled on the modem and router to ensure that clients can obtain their IP addresses from the DHCP server, which may not always be the same IP address as the one assigned by your ISP.
If you don’t use DHCP, then you’ll need to manually enter the client’s IP address into each of your devices. This can be time-consuming and error-prone if there are many devices connected to your network.
Using DHCP allows you to keep track of your client’s assigned IP address—which will likely not change over time—and also provides a way for clients to obtain their own IP addresses when they connect to your network.
This allows them access to resources on the internet without having to manually enter those same resources into their devices’ settings menus every time they want to use them (such as streaming services).
How do I find my router’s DHCP settings?
If you’ve never used a router before, you might be wondering how to find your router’s DHCP settings. Fortunately, it’s not hard to find them! In this article, we’ll walk you through the steps of getting started.
Step 1: Power on your router and wait for it to power up.
Step 2: Once the device is turned on, look for an “Internet” or “WAN” button on the front panel of your router. If there isn’t one, try searching for it in another area of the device that might have been missed (for example, in the case of an older model).
Step 3: Once you’ve found the button(s), press them both simultaneously until they light up in white. This means that they’re ready for the input! Now that they’re lit up, move on to the next step.
Final Talk
It is frustrating when your ISP’s DHCP does not function properly; it’s awful. We hope that all these steps will help you solve this problem. so you do not have to live through that experience ever again. Moreover, Do check that your system is not violating Dynamic Range Window.




Leave a Reply