Roomba offers well-organized error codes that cleanly identify the many sorts of faults that your Roomba robot cleaner might experience. These error codes are accompanied by a plan of action in addition to classifying mistakes and stating their type. So, if you run across a problem, keep reading to learn how to fix it. The Roomba (j series) vacuum has inadequate airflow, resulting in error eleven (11). A new cleaning head system may be required.
The error occurs when you did not set up the dust bin precisely on the Roomba or when the sensors that check the bin show inaccurate data to Roomba.
How To Fix The Roomba Bin error? Roomba Is Not Detecting an Installed Bin
Quick Navigation
Bin errors are most commonly noticed when the dust collecting Bin on your Roomba has not been correctly closed or fitted.
The Roomba uses a collection of sensors to determine if the Bin is correctly inserted, and those sensors can lose their accuracy with time.
Your Roomba will display the Bin error if the sensor believes the Bin was not installed correctly or is in some other way that it should not be.
Software flaws can cause this issue, and because Roombas seldom receive software upgrades, restarting is your only choice. Fortunately, resolving this issue is simple, so keep reading to learn how.
A software reset can address any issues that prevent the robot from accurately detecting a bin and determining if it was installed correctly.
1. To restart a Roomba I Series.
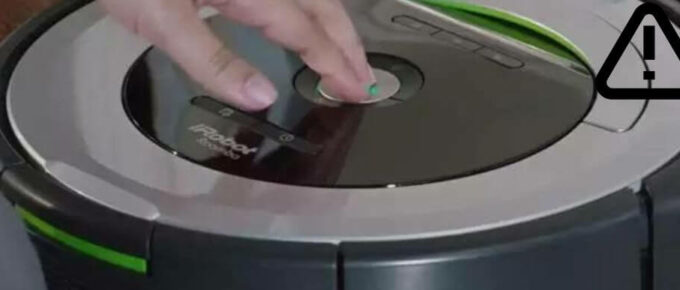
Step 1: Press and hold the Clean button for at least 20 seconds, then release it when the white light around the controller begins to rotate clockwise.
Step 2: Wait for the Roomba to switch back on for a few minutes. When the white light goes off, the restart is complete.
2. To restart an S Series Roomba, follow these steps:
Step 1: Hold the Clean button down for at least 20 seconds before releasing it, when the white LED ring appears.
Step 2: Wait for the Roomba to switch back on for a few minutes. When the white light goes off, the restart is complete.
Roomba Bin error 14:
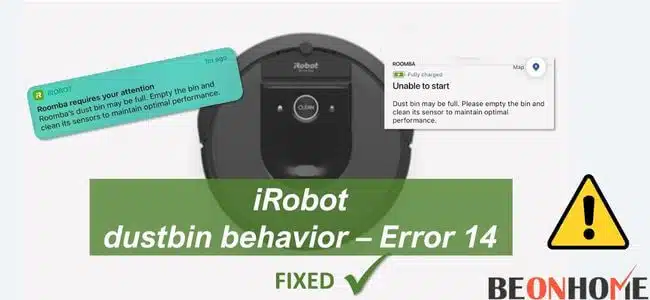
Roomba is simple to use, but it is prone to mistakes. The robot is programmed to operate only under optimal settings, and if anything goes wrong, it will display an error message.
When the Bin of the Roomba is not closing correctly, Error 14 or 1-4 is frequently seen.
The Bin may not close owing to hardware issues with the Bin’s connections. When this happens, the error 14 or 1-4 appears, indicating that Roomba cannot recognize a Bin that has been installed.
The Roomba will not start cleaning if it does not detect the Bin. As a result, we’ll look at all of the alternative remedies in this post. So, without further ado, let’s dive right in.
Step 1: Turn the Roomba robot’s dust bin over and remove the screws (typically 4-6 screws) on the bottom of the Bin (where the unit’s fan is situated).
Step 2: Disassemble the bin unit and clean the dust/debris from the fan. You may use a hard air blow or a good shake on the component, but nothing sharp or sticky should be used there.
Step 3: Then, ensure the rear of the Bin’s vent is clear and the vacuum hole. Check to see if the Bin’s fan can spin freely.
Step 4: Remove and replace the Roomba robot’s battery. Make sure the robot’s contacts aren’t protruding.
Step 5: To create contact with the Bin and the housing, place a bottom piece of a can or a metal/tin foil strip over the shattered piece.
Step 6: Check to see that the dust bin is securely closed (you may press the sides of the Bin after removing the handle).
Step 7: Clean the fan correctly using a q-tip at the end. You may also use sa
Roomba Bin error 8:
If your Roomba is reporting an error 8, it suggests a problem with the vacuum motor in the dust bin that may be removed. There’s a vacuum motor in there, believe it or not!
The problem may often be resolved by opening the top of the dust bin and removing any hair or other material that prevents the vacuum motor from spinning.
Start by inspecting your Roomba’s filter for dirt, then look for anything like hair and leaves that may have accumulated behind or on the grate beneath the filter. A lack of air movement caused by a dirty filter or trash around it might cause your Roomba error code 8.
Step 1: To begin, take out the dust bin from your Roomba robot vacuum.
Step 2: Using a screwdriver, remove all of the screws from the top of the dust bin (a tiny one).
Step 3: Carefully lift the dust bin and remove the two plastic arms to disconnect the lid from the bin. In the photo below, you can see the plastic arms.
Step 4: With a pair of tweezers, locate the vacuum motor (round item in the middle of the photo below) and remove any pet hair or debris that may be preventing it from spinning.
Step 5: Next, spray inside all elements of the vacuum motor and the surrounding region with canned air (available at home improvement and computer stores) until it’s nice and clean.
Step 6: Try to spin the little black fan on the vacuum motor with your tweezers. It should be able to rotate freely. It must be capable of freely rotating.
Step 7: If not, you may need to replace your vacuum motor. Snap the top back into place after reinserting the two tiny plastic arms.
Step 8: Reinstall the filter in the dust bin after replacing the screws. Start the Roomba by placing the dust container inside.
Roomba Bin error 11:
Roomba robots have their own set of challenges. However, by following this Roomba vacuum troubleshooting tutorial, you can resolve problems at home.
Because they aren’t any fatal mistakes. They’re simply routine maintenance that your Roomba will require from time to time. And numerous sorts of sounds will alert you about your Roomba’s status. Merely counting the sounds will reveal the issue.
Step 1: By following the instructions for replacing the Cleaning Head Module, you can remove the Cleaning Head Module.
Step 2: Next, look for debris in the fan/scroll/vacuum assembly. Make careful to look at both the entrance and the exit.
Step 3: Using compressed air, remove any debris (or Air Duster). Bin Filter should be replaced.
Step 4: Three complete revolutions of the Vacuum Motor’s metallic part. Counterclockwise first, then clockwise.
Step 5: If you are unable to rotate the vacuum motor, follow these steps:
Step 6: Elevate the robot 1 foot off a hard surface and drop it (make sure it’s a surface or piece of furniture you’re ready to scratch or damage, like a workbench).
Step 7: Rep the scroll-clearing procedure. After two failed tries, replace the Cleaning Head Module and Reinstall the paper to correctly seat the Bin on its sides.
Moreover you can install a good sweeping dustpan to help your Roomba clean better
Final Talk
Giving your Roomba a thorough cleaning every few weeks is a smart idea. You’ll be able to avoid problems like these in the future. Consider it similar to routine auto servicing. This is a machine that vacuums your home every day.
It will generally spend 3 to 4 hours every week traveling over carpets and dirt, sucking up dust and hairs, depending on the size of your home.
As a result, you should make an effort to look after it. If the preceding methods do not resolve the issue, you may need to replace Roomba’s full Bin and vacuum motor components. If your Roomba is still under warranty, the factory may be able to help you. If your Roomba has reached the end of its warranty period, you might be able to get a reconditioned bin on eBay or Amazon.


Leave a Reply