You have invested in the Nest Smart Thermostat. Everything was working fine, and you love the way you could control your home temperature right from your smartphone. Then, after a few days, your home’s AC stopped functioning, and the thermostat was showing the text ‘Delayed.’
There’s no need to fret because, in this article, we have gathered lots of information on how to fix the Nest Thermostat delayed issue. Read and follow the steps, and enjoy controlling your AC temperature again. We incorporated all information we could gather into this detailed article.
What is Nest Thermostat “Delayed”?
Quick Navigation
Low power is indicated by the “Delayed” notice on your Nest Thermostat. The temporary solution is to remove the Nest Thermostat display and charge it for 2 hours using a USB connector. Connecting a Common (C) wire to both your Nest and your furnace is the longer-term solution.
What Are The Causes?
The latest Nest thermostat models (Learning and E) include lithium-ion rechargeable batteries. This is only a backup battery.
The Nest backup batteries will kick in and store your Nest data and settings in the event that your power goes out for whatever reason.
These non-replaceable rechargeable batteries are non-replaceable (the original Nest had AAA alkaline batteries that you could just take out and put new ones in).
The batteries are no longer accessible in recent versions. To obtain entry, you’d have to start dismantling your Nest one by one.
Your Nest will most certainly begin to malfunction after the rechargeable batteries run out.
The notification “Delayed” you’re reading now is one of the earliest indicators of this.
Method To Fix Nest Thermostat Delayed
Today, we’ll go through how to troubleshoot a Nest thermostat that is displaying the “Delayed” warning. The good news is that a delayed cooling starts indicating that your thermostat is functioning properly.
The main reason why your Nest thermostat has suddenly gone into a delayed mode is due to a power outage or an underperforming thermostat.
The Nest Thermostat does not work off of power lines, contrary to popular belief. It contains an internal Lithium-Ion rechargeable battery that gets power from the HVAC system.
Fix Using a C-Wire Adapter
A C-Wire Transformer is a simple and low-cost device that can keep the thermostat powered up at all times. It uses main power to reduce the burden on the HVAC system.
The installation procedure is straightforward. Two wires are connected to the transformer. The wires should be connected to the thermostat’s Power (RH) and C-terminals.
Then, using a wall outlet, connect the transformer unit to the mains. One thing to keep in mind is that your thermostat should be close to a wall outlet.
The main drawback to this method is that the adapter wires may protrude from the thermostat, destroying the neat appearance. After testing several C-wire adapters, we recommend Ohmkat’s C-Wire Adapter.
They provide a lifetime guarantee, which means that if it ever stops working, they will replace it for free. We’ve been using it for over a year and have had no problems.
The following are some of the problems caused by the lack of a C-Wire:
1. Fix Reduced Battery Life
The internal battery will be harmed if the charging signal is erratic, as Lithium-Ion batteries easily deteriorate. Although replacing the battery is less expensive option, these batteries can be hazardous to the environment and pose a fire threat.
2. Fix Motion Sensing Disabled
When the Nest thermostat detects someone passing by, it automatically switches on the HVAC system. This feature is automatically disabled when the battery level is low.
3. Check Disconnecting from WiFi
The thermostat’s WiFi connection is also affected by the battery’s lack of power, resulting in numerous disconnects and the loss of remote capabilities.
4. Fix Damage to the HVAC system
The thermostat sends a signal to the control panel to start charging the batteries when the HVAC system is turned off. However, some systems are extremely sensitive to this signal and turn it on at random.
Your fans, too, will not function properly. Your HVAC system won’t be able to go from heating to cooling, and the temperature will be inconsistent. This can cause a lot of noise and shorten the life of your thermostat.
Method To Fix when there is no C-Wire Adapter
Here is how you can fix your thermostat if it lacks a C-Wire in the first place:
1. Installing a C-Wire with the help of an Adaptor.
So, the C wire is absent. Using a C wire adaptor is one solution. These adaptors are simple to set up and test with your Nest thermostat.
The Nest thermostat is powered by these adaptors, which are inserted into a nearby power outlet. Also, don’t be concerned about the thermostat’s unattractive wires. Concealers can be used to disguise this.
These adaptors connect to your thermostat directly. This should take care of your “Delayed” alert. Thankfully, most C wire adaptors come with easy-to-follow instructions that will show you how to properly install them.
2. Hardwiring a C-Wire
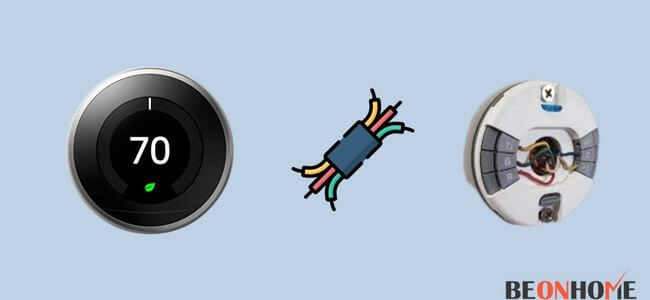
You could also hardwire a C wire yourself. Connecting both ends of a C wire to your HVAC system is typical when installing one. Most of the time, one end will be connected to the furnace and the other to your Nest thermostat.
Just make sure that all of the equipment’s power is turned off before you begin the installation.
This work can be challenging and time-consuming. This is because the wiring is most likely hidden behind plastered walls. This is why, to ensure proper installation, we recommend consulting a specialist.
If that sounds like too much work, you could use a sender and receiver to wirelessly link a C wire. These Common Makers could help you solve your “Delayed” message while also saving you money and time.
3.Using G-Wire as a C-Wire
The green G cable allows you to regulate your blower fan individually. Many people, on the other hand, confuse the G wire with the ground wire.
You’ll need to unplug the G wire from its G terminal if you follow this method. This can be found on the inside of the thermostat. Then you’ll need to install it in the same way you’d install a C wire.
The furnace will need to go through the same procedure. This is a low-cost and simple alternative. It should keep your thermostat powered up at all times.
The main disadvantage is that you will no longer have autonomous control over your ventilation fan.
Before you disconnect the G wire, double-check that the fan isn’t attached to anything else. Once the G and Y terminals are vacant, you may need to connect a jumper cable to them.
This option should be avoided if you prefer to use the “fan-only” mode.
Short-term remedy – charge your Nest.
Luckily, there is a very straightforward, short-term remedy that will get your Nest thermostat running again and resolve the “Delayed” message.
All you need to do is charge your Nest.
To achieve this, start by turning off the Nest thermostat display. Turn it around, and you will notice a USB port on the top rear of the gadget.
The kind of USB charging cable you require (either micro-USB or mini-USB) depends on the model of Nest you possess.
Plug it into a power charger (or even the USB port of your laptop) to start charring your Nest.
Make that the Nest is flashing red since this signifies that it is effectively charging.
On an average, your thermostat takes roughly half an hour to charge. If your battery is entirely empty, it will take 2 hours to recharge.
You can evaluate USB charging compatibility here.
Now that your Nest is done charging, you may attach it to your wall. After some time, however, the battery will inevitably expire, and you’ll need to recharge it again.
If you want this problem addressed indefinitely, stay reading for a more permanent solution.
Long-term repair – connect C wire to Nest and furnace
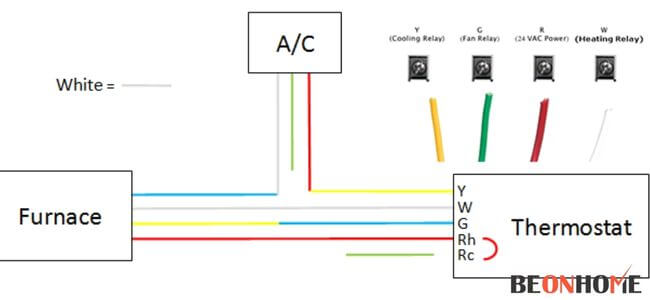
For the majority of Nest configurations, the Nest will require a tiny amount of electricity from either the heating or cooling cables. This electricity is just enough to keep the Nest powered and on all the time.
However, on occasion, the heating and/or cooling cables don’t deliver enough power for the Nest. In certain instances, you need something called a Common wire (“C wire”).
Before we start, click Settings on your Nest and go over to Equipment.
Your Nest will show a live image of which cables it is detecting. The yellow cable is your cooling, white is heat, green is the fan, and power is red.
The cable you’re searching for is blue, the Common wire that plugs into “C.” The Common wire will extract a modest quantity of low-voltage electricity from your furnace to power your Nest.
If you don’t see a blue Common wire on the Nest display, you’re going to read on.
1) To start, go to your circuit breaker and switch off the breaker that controls the Nest thermostat and do the same for your furnace (or simply unplug it) (or just unplug it). You want all the electricity OFF.
2) Next, pull the display casing off the Nest and take a brief glance at the cables present. You will notice all cables connected except one. You may have to dig around a little to locate it, but my assumption is that there is a blue Common wire hiding in there someplace.
3) Once you identify the Common wire and check that it is there, it’s time to head to the furnace.
4) Inside the furnace, you’re searching for a motherboard that has all of the low-voltage connections connected. You may have to remove a metal panel from the furnace to get to the motherboard. You’ll probably need to remove a few screws first.
5) When you discover the low voltage cables within your furnace, you’ll usually notice two main wires that break off. One major cable has 2 off-shooting wires coming from it, while the other main wire has 5 off-shooting wires.
6) Leave the main wire with 2 off-shooting wires alone. This one connects to your exterior AC unit and isn’t the one we want.
7) The other main cable with 5 off-shooting wires is our Nest thermostat line. One of the 5 off-shooting wires is blue, and it is not connected. That’s your Common wire. You want to connect the Common wire to the motherboard where it reads “Com.”
8) There could already be a wire connected to “Comm.” That’s alright; it can handle two cables with no issue.
9) Keeping the furnace and Nest switched off, return to the Nest and take out the blue Common wire and attach it to the “C” port of the Nest.
10) Now switch the electricity to the furnace and the Nest back on. Replace the Nest display cover and click Settings, and scroll over to Equipment again. Confirm that the blue C wire is now displayed on your Nest.
11) That’s it, all done! Your Nest should have a consistent supply of electricity now, and you should never encounter the Delayed error again.
Common problems fixed by C-Wire
If you’re still not persuaded that adding a C wire to the circuit would permanently fix the “Delayed” problem message, here are five more challenges that a C wire can help with:
- Strange noises are coming from your computer: chattering, stuttering, clicking, or thumping. This is produced by your computer turning on and off quickly.
- The heat or air conditioning is always on and will not turn off.
- In a brief length of time, heating or cooling cycles on and off.
- The system fan is always on or refuses to turn off.
- In a short length of time, the system fan turns on and off repeatedly.
Simply explained, Nest thermostats perform best when they are connected to a reliable power source. A C-Wire is the only way to get this steady power delivery!
FINAL TALK
The C wire is usually where you’ll find the source of the problem. You should not have any problems with your air conditioner if you maintain it regularly.
While it may appear to be a serious issue, it is a perfectly common feature of your thermostat and HVAC system. It shouldn’t be a cause for concern if it just shows for a brief while. However, if this occurs for an extended period, there may be a more serious problem to address.

Leave a Reply