If your Next Thermostat constantly flashes low battery warnings, even after charging. It means there are some issues with Its battery, and you should fix it before something bad happens.
Here‘s a complete guide on how to fix the Nest Thermostat Battery won’t charge issue.
What Are The Common Battery Issues?
Quick Navigation
Nest Thermostat should be able to charge itself from the power supply automatically. In case of battery malfunction, the functioning of the device is affected.
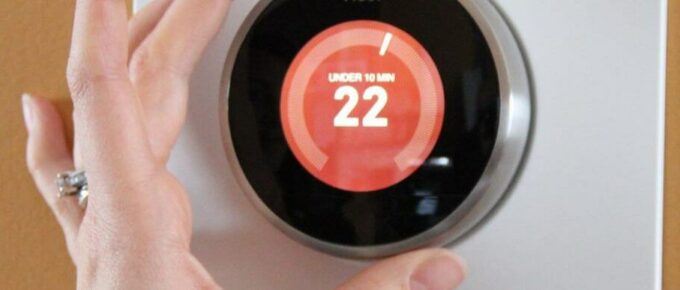
When the battery is low, the device will indicate on its screen by flashing a low battery, delayed warning or a blinking red light.
Common issues include:
- The display screen of the Nest device would be unresponsive or malfunctioning.
- The device will not be able to regulate the temperature of rooms and can affect your HVAC’s heating and cooling functions.
- The WiFi connection will not work efficiently, making it difficult to manage the system remotely.
How To Fix Nest Thermostat Battery Won’t Charge Issue
Nest Thermostat has a battery that charges itself from your HVAC system’s power supply. The built-in battery constantly charges itself and works as a backup when the power supply is cut off.
The Nest battery is charged using RH and RC wires connected to the HVAC system and also uses a C-wire that completes the circuit.
You don’t need many details about this, but the battery not charging could be due to problems in either of these wires or connections.
Here’s what you can do when the Nest Thermostat isn’t charging:
1.Try Restarting the Nest Thermostat
Step 1: Press down on the thermostat ring for about 10 seconds until the display turns off, and release the ring.
Step 2: Press down on the ring once to turn it on and restart the thermostat. Restarting the device might solve the issue.
Step 3: From the Menu settings, check if the device receives 3.8 volts of power. If the battery is less than 3.8V, the device is not receiving enough power to charge itself.
2. Check the Nest Device Connections
Step 1: Install the C-wire connection. The C-wire connection completes the power supply’s circuit for recharging the battery.
Step 2: Check if the connections are proper.
Step 3: Check your thermostat’s RH and RC wires to the HVAC system. Any loose connections in these wires could result in the battery not charging properly.
Step 4: The wiring must be regularly checked and replaced if damaged.
3. Charging the Nest Thermostat Manually
If the thermostat isn’t charging automatically, charging it manually is an option for temporary purposes. Sometimes if the battery is completely drained, it might need to be manually recharged to start working.
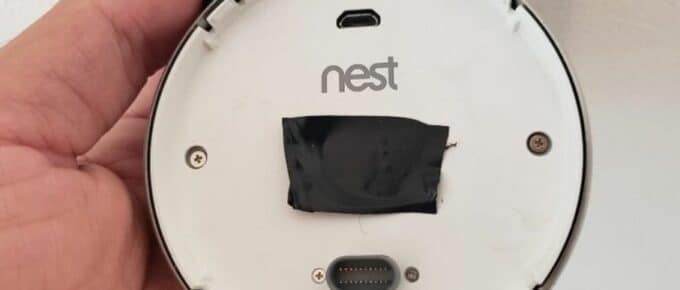
Step 1: Remove the display of the device.
Step 2: Identity which USB port the device has. Different generations of Nest Thermostats use different USB cables. Nest Thermostat E and Nest Learning Thermostats 2nd and 3rd Generations have a Micro-USB port. The first-generation Nest Learning Thermostat has a Mini-USB port.
Step 3: Connect it to a wall charger, your laptop, computer, or any power outlet.
Step 4: If the device is charging, there’ll be a blinking red light on the screen.
Step 5: Charge the battery for around 2-3 hours.
Step 6: Connect the device back to it’s wall base.
4. Resetting the Nest Thermostat
Resetting a device could solve many problems.
Step 1: Press the thermostat ring to open the “Quick View” features.
Step 2: Select “Settings” from the Quick View menu.
Step 3: Select the “Reset” option and reset it back to “All Settings.”
This will remove any custom settings on the thermostat and install the default settings after resetting.
5. Replacing The Nest thermostat Battery
Most Nest Thermostats come with an in-built battery that cannot be removed. Only the batteries in the 1st Generation Nest Learning Thermostat can be replaced.
6. Replacing Your Thermostat Unit
After trying the previously mentioned methods to fix the charging issue, if it still doesn’t work the unit might be faulty. Replacing the unit can be the last resort.
- Step 1: Call Google Support. Mention the issues and ask what options are available.
- Step 2: Get the internal battery replaced or the unit replaced.
This is covered under the warranty period.
How Do I Know If My Nest Thermostat Battery Is Bad?
- The Nest Thermostat will flash low battery warnings.
- The display will malfunction.
- Constant low battery warnings despite charging them.
- Nest Thermostats may not function properly, affecting the home’s heating and cooling.
- Despite trying all the methods to charge and if still, the battery cannot retain charge, the internal battery could be damaged.
How Long Will A Nest Thermostat Battery Last Without Power?
The Nest Thermostat batteries charge continuously using the power supply. In case of power failure, it can last an average of up to 2-3 hours before being recharged.
The battery’s overall life depends on the device’s use and maintenance. In some cases, the battery starts failing after 2 years with strained usage and improper charging.
Final Talk
It is not uncommon for electrical devices to malfunction. The Nest Thermostat has an automatically charging battery that recharges from the power supply to the HVAC system. Restarting and resetting the device are the go-to solutions in case of a charging issue.
However, if the problem isn’t solved after that, there could be problems with the wiring, including the C-wire and RC and RH wires. These connections are important and must be well maintained.
Manually charging is a temporary solution for the charging issue, and if all fails, you might have to replace the internal batteries or change the unit.


Leave a Reply