If you have a Nest Hello doorbell installed at your home, you expect it to alert you every time someone rings your doorbell. However, if your Nest Hello is not ringing the chime inside your home, it can be frustrating and leave you feeling vulnerable.
I have faced similar issues with my Next Hello. I have figured out possible reasons why your Nest Hello may not be ringing the chime and provided you with some steps to try and fix the issue.
By following these steps, you should be able to get your Nest Hello doorbell working properly again and have peace of mind knowing that you will be alerted every time someone is at your door.
Troubleshooting Nest doorbell chime doesn’t ring or sounds weak
You do not have to freak out if your google nest doorbell chime is not working, it can be fixed easily without following any hard steps; to know more we suggest you go through the steps as they will give you a clear understanding of how the issue can be resolved –
Step 1: Check the settings in the app
Most of the time the settings that are in-app not being turned on can cause issues like these. So the first and most important step for you to do is to check the settings by going into the app and rechecking if the chime is on.
Because it can get off due to any issues like connectivity problems and can also change while you try to set up any other device in the same app.
So make sure you go through the settings and revise all of the steps that you performed before when you connect the google nest for the first time.
Step 2: Check the status of the doorbell

If you have checked the settings and they seem fine then the other step you can do to check the problem is by reviewing the power sign that is set up on the device i.e google Nests.
If it’s powered on then there can be any other issue but if the power sign is not visible then please check if there are any loose connections.
And if you find any then they can be easily resolved by getting another adapter as loose connections can happen due to loose plugs, so try to replace the adapter with your plug as it can resolve the issue
Step 3 : Reset the Google Nest Doorbell

- Once you check both the settings on the app and the power status then the best thing you can do is to make the google nest ring by resetting the device. Follow the steps to reset the Google nest –
- By using the release tool, remove the doorbell and the base of the device
- Press the reset button on the back by inserting the release tool on the hole placed at the top, also hold the two front buttons for 10 seconds of the big doorbell
- Once you do that, the doorbell will pass a sound or will ring while blinking blue light and will turn yellow. After that, all the lights will turn off
- Release the two buttons once the lights on the device get turned off
- After a successful reset, it will stay offline in the google Nest app until you discard it from the app
Step 5: Check the sound wires of the doorbell
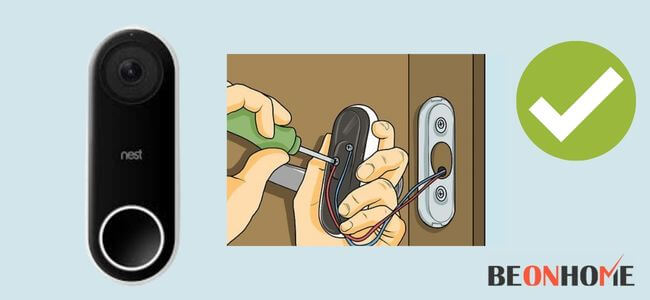
Due to connectivity issues, it is possible that the sound of the bell does not work properly or at all. To insure it you can check the writing of the sound attached to the doorbell.
The process of checking the wires will be different and will depend upon whether you have a mechanical chime or an electric one.
For eg, if it is a mechanic then take the cover off and hold the press button to check if it rings and if it is electronic then first check all the wires are exactly connected to as mentioned in the guide and then review if there is any fault in the wires.
Step 6: Check the wiring of the doorbell
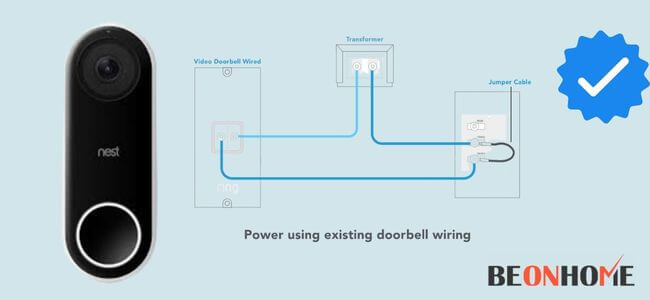
The best way to check any faults is to check if there are any faults in the wires of the doorbell, as it can also lead to not getting enough sound from Google Nests.
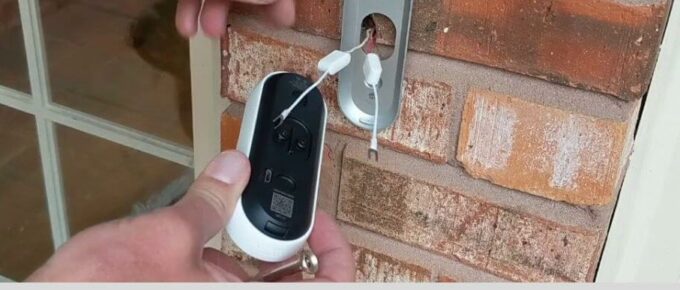
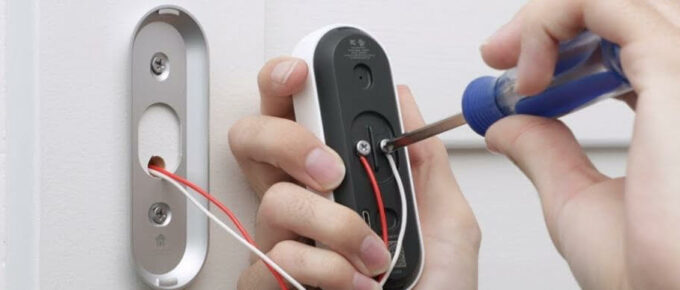
Check if the wires that are connected with hello are properly installed as they can be lost when you put hello on the backplate. to check that simply take off the plate by making use of the release tool and check if there are any damaged wires.
After doing so, again put the plate back in its place by keeping the wires with the help of a screwdriver. This step can lead you to a point where it is possible that it can be one of the reasons why the device is not working properly.
Step 7: Scan the temperature on the device
If the device is getting hot temperatures due to direct sunlight, humid areas, and cold temperatures then there is the possibility that the device does not work fine.
The minimum temperature any device can go through is set and the instructions are also mentioned about where you should put the device to avoid unwanted problems.
Due to this, the device will turn off repeatedly when it receives a bare temperature. The device will stop ringing but you will not stop receiving the notifications.
If the problem still exist, you should try to install your nest hello without a chime, or connect it with the chime of another doorbell.
Step 8: Contact Support
If all the steps do not help you fix the device in any way then we will advise you to connect with the support team of the brand you own.
They can guide you according to the problem you are facing and can surely provide you with some troubleshooting steps
How To Fix Nest Hello Weak Ringing Chime?
Step 1: Charge the device
This one is the most common reason why your device does not ring; hence to ensure, check the battery of the device.
Every time the battery is low it sends you a reminder to charge it, but in case you have missed it then you can simply charge it by removing the backplate of it and plugging in the USB- C type cable in it. That way the device can easily start ringing again.
Step 2: Check the Wifi or Internet Connection
A low or weak internet connection can be the reason if the Google nest is making weak sounds that are not audible.
To fix that simply set up the device near the wifi broadband and if the problem is of internet connection then try turning off the again on wifi to get an appropriate and required network to run the smart devices in your house. It is an easy way to resolve the issue of weak chimes and can be performed directly.
Final Talk
Fixing any smart device can be tough and easy at the same time, it depends on what issue the device is going through. All the steps mentioned above can be performed by you but do not forget to take precautions while checking the wires. This guide can help you save your time and we hope you got the solution you were looking for.


Leave a Reply