Nest Hello is among the market’s fastest and most featured rich video doorbells. However, the installation is the most challenging part of the process of setting up a nest hello.
For this, you must drill a Nest connector in the chime box. If you don’t want to do it, don’t worry This guide will tell you all the steps and procedures to install Nest Hello without Chime.
Method To Install Nest Hello Without Chime or Existing Doorbell
You clearly know who is on your door through this Nest Hello Video Doorbell. People go creative in modifying or disabling features in the bell.
However, the chime is a crucial part of the bell. Getting the bell installed without the chime can be challenging.
Still, people have done it using the steps below, and these quick steps will help you too. We will mention the substitute set up and how to go about it. Read through to get an insight about them.
1. Plug-in Transformer/ Indoor Power Adapter
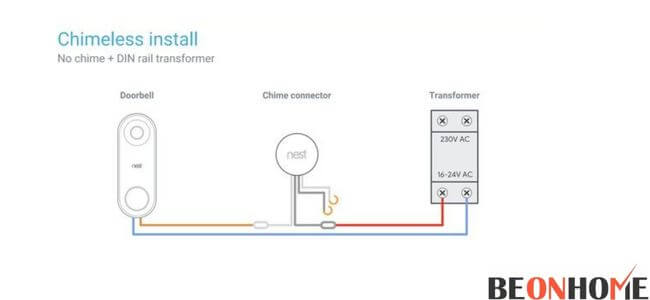
The process that goes without a chime is usually setting up a transformer. With a transformer, it requires proper wiring too.
We will substitute this process in a new way by using a plug-in transformer. The power adapter will function in the same way a suitable wall-mounted transformer works.
Things to Ensure.
- Purchase a good quality product, as the wrong product can damage your Nest Hello.
- The Adapter should have a built-in transformer, which regulates the voltage.
- Location
- Nest Hello requires wires capable of delivering 16-24 V AC. Power of 10 VA is needed in North America.
- It should provide 12-24 V AC and power of approx 8 VA in Europe.
- Get an adapter with complete instructions attached. Support in the installation by the manufacturer is also a possibility.
- Ask for lifetime guarantees and installation support.
- Go for offline shopping mode, as some products online may damage your system.
- The suitable adapters are easy as plug and play. It would take only 2 minutes to get it going. You will require no wiring.
What to do if the wire is too short?
The wire comes in ranges between 12-14 feet. Add an extension if your power plug does not reach the door in this setup.
Adding an extension can help you connect the bell to the switchboard easily. You can use a plug-in chime with your Nest Hello if you don’t want to deal with the hassle of installing a chime.
2. Nest Chime Connector
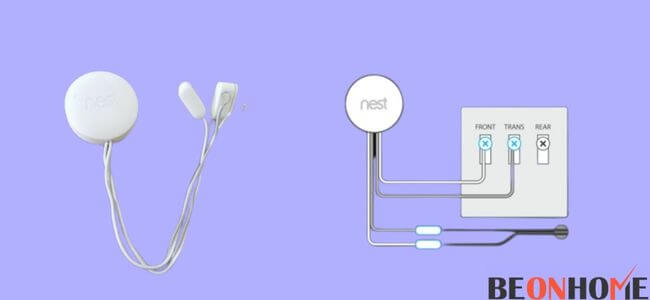
This item allows Nest Hello to having a circuit independent of the chime’s circuit. So if you use the plug-in transformer, you don’t need the Nest Chime Connector in the package.
The Nest Chime Connector enables the doorbell to receive constant power. This action happens without any interference. As a result, the camera continuously records.
The Setup and Installation Process:
- Tools
- Screwdriver
- Screws
- Drill
- Beats (appropriate sizes)
- Extension Cord (in some cases)
Time – 60 minutes.
3. Break the Power (IMPORTANT )
Turn off the power using the electrical junction. You can always turn off breakers if you have no clue until the doorbell stops working.
If nothing works, try the main breaker, which shuts off all main power. We will ensure this before starting for your safety.
Step 1 – App Setup
Before beginning the installation, you need to set the equipment. After that, the app settings are easy to understand and implement. Then, follow the straightforward, easy-to-apply instructions and set up the whole device.
Elaborated steps to set up the app:
- Connect the WiFi as soon as it opens.
- Try ringing the bell to see if you get notifications simultaneously.
- Ensure switching off an internal chime in the Hello setting (Nest App).
- Choose the language of the audio recording as well. This step ensures that you can talk with the visitors.
Step 2 – Location and Placement
Typically, the placement is supposed to be 40 inches from the ground (4 feet). We recommend that you deploy it right next to your front entrance.
The height should be such that you can precisely see the people’s faces. The idea is to know every face willing to enter the place.
Step 3 – Angle and Tilt
Now comes the tricky part: the angle. If you believe the angle is incorrect, use the wedges in the box to create a proper angle. Again, remind yourself that the idea is to see each face.
Step 4 – The drill and hole
Use the wall plate to mark the places where you should make holes. Then, remove the plate and drill the spots using a suitable beat. We recommend that you highlight three holes as a guide.
However, turn off the power to anything near the area before drilling. This step is just for your safety—one bigger hole for wire and two smaller ones for the screws to mount.
Step 5 – Connection
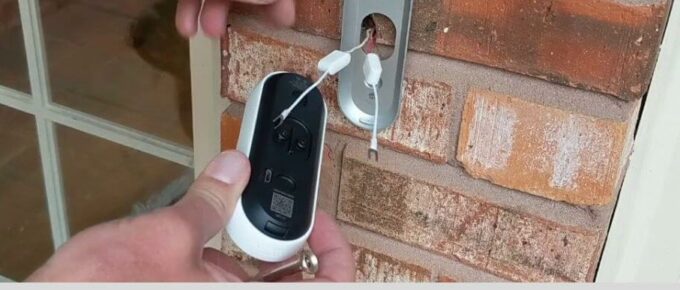
Do not turn the power adapter on; connect the wires first. Then, attach the two wires in Nest Hello and lock them up with screws. Ensure the wired connection is properly made; otherwise, your doorbell will keep going offline.
The access wires go inside the wall as the nest comes on the wall plate. You can use the cable clips to align the cables together.
Step 6 – Plug and play
The adapter goes into the power plug. Use an extension cord if the wires do not reach the power plug. Turn the switch on and wait for the blue color in the ring. Check for loose connections.
Note – The adapter wires should go directly into the terminal of Nest Hello. So do not get confused about wires; any wire can go to any terminal.
Step 7 – Chime Plug-In
Buying a plug-in chime is the simplest way. Get your doorbell attached to a chime without thinking about the hard wiring.
Steps to follow:
- Simply connect one end of the transmitter with the plug-in chime to your Nest Hello.
- The other end will connect the power adapter. It makes a closed circuit.
- You can now plug in the chime. Connect this to any power outlet in your home.
- Connect it to a location where people can hear it throughout the house.
4. Nest Hello Installation (Wireless)
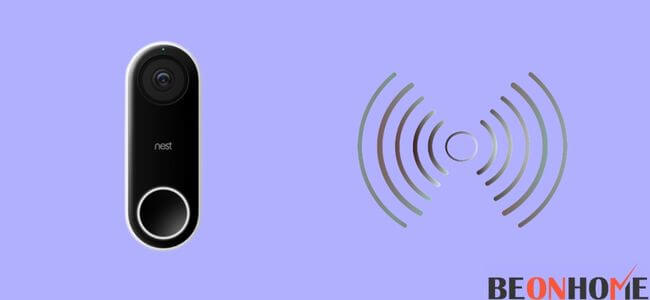
Steps to follow :
- Step 1 – Charge up the whole unit.
- Step 2 – Scan the QR code on your Nest Hello. This step will add Nest Hello to Google Home’s list. Do this by following the prompts given. Ensure that the WiFi is on.
- Step 3 – Now, it is time to mount the wall plate. Once this is done by drilling and hanging, Put the Nest Hello on it and fix it.
- Step 4 – The placement and app connection is completed. Give it a try and test the whole system.
If you face any while or after turning the entire unit on, just reset your nest Hello doorbell.
Why Wireless? Follow through to see the benefits:
- You cannot connect the older doorbell to the new Nest Hello Chime.
- It has a quick installation process to work.
- It is an excellent option if you do not have a doorbell installed.
The Special Features for you
You can configure this unit in a variety of ways. It can even include spoken language in place of a doorbell. All your notifications are sent directly to your smartphone or Google device.
This Setup allows you to choose from various valuable functions. This program can even recognize people’s faces. After the completion, quick taps can give you access to the door camera.
What exactly is Nest Hello quiet time, and how can you put it to use?
It is not necessary to remove the chime. Instead, you can program the device so that the chime only sounds when you want it to.
For example, quiet time is a setting that allows you to specify a period during which the doorbell will not ring. So if your pet or child has a problem with it, you can switch the chime off occasionally.
Steps to Activate
- To enable quiet time, open the Nest app.
- Tap on the live stream. You will then have to pull it up. This step will reveal all the events.
- Tap on the bottom right corner of the screen (Quite Time Icon).
Final Talk
This article was a worthwhile read. It gave you all the details you need to know about Nest Hello doorbells. The installation, the voltage required, and the setup process. We also talked about the wireless and wired options in dept. So whenever there is a need, don’t think twice. if you have a chime already installed, you can connect multiple doorbells with it.
This article will be your one-stop solution as it provides easy-to-do setups. Come here for information, steps, or guides related to the Nest App and Doorbells.

Leave a Reply