Are the cloudy windows of your room preventing you from enjoying the scenery of the beautiful outdoors? It’s time to make your windows all clean again. Hazing is a common problem for old windows in most households. Whether it’s the bright sun or pouring rain, your windows withstand it all; but in the process, they lose their clarity.
To make your windows look brand new again, removing the foggy film from windows or the layer of deposited fog on the glass is the first step. In this article, we will provide you with an in-depth knowledge of making your windows fog-free.
How To Get the Window Haze Off Glass
Quick Navigation

A clean window is essential for making any household feel warm and welcoming. Most houses in modern times have window tints or films. These films get hazed up much more than normal glass. Hence they need to be cleaned and changed much more often than normal glass windows.
A clean window is essential for making any household feel warm and welcoming. Most houses in modern times have window tints or films. These films get hazed up much more than normal glass. Hence they need to be cleaned and changed much more often than normal glass windows.
STEP 1: Prepare A Hairdryer Or Heat Gun
To get that fog to evaporate, we need to heat the window up. For this, a hairdryer or a heat gun will work well. Although a high-power hair dryer will serve better and take less time. If you don’t have one, just use the one you have for a longer period.
STEP 2: Using The Heat Gun
Heat guns can be a bit tricky to use. Make sure you wear heat-resistant gloves while using one. Thick rubber gloves can also do the trick. Make sure to hold it at an angle, preferably 45 degrees, to the exact point that you are trying to heat.
STEP 3: Loosen The Adhesive On The Window Tint
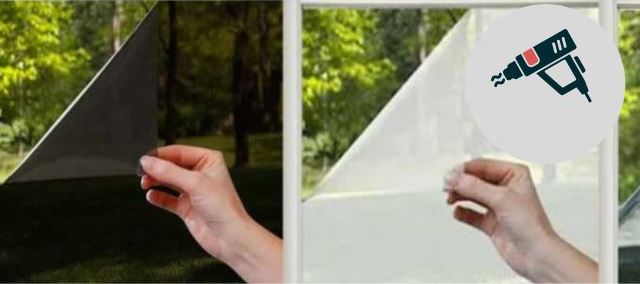
Now using the hairdryer or heat gun, heat the window tint so that the adhesive gets loosened. This will help you to lift the edges of the tint later on.
STEP 4: Set The Heat Gun On High
Now comes the tricky part. Set the power of the heat gun or the dryer to high and very carefully blow it across the entire window surface. Make sure to keep a distance of about 2 inches from the window, so that the glass is not affected.
STEP 5: Lift The Sides And The Edges Of The Tint
Now slowly lift the edges of the tint to remove them. Poke at the edges. Re-heat them if necessary to further weaken the adhesive.
STEP 6: Removing Them From The Window
You should pull the tint in one direction only and pull slowly so that it comes off in one piece. That will just make things easier for you. It is quite satisfying too! You can also take the help of tools like a plastic scraper to make things easier.
STEP 7: Once You Have All The Tint Removed
Once the tint is off the window, spray the whole window with WD-40. This will remove any leftover adhesive on the glass.
Tools: WD-40 or any other glass cleaner in a spray bottle
Time: 5- 10 minutes
STEP 8: Clean The Outside Of The Window With Glass Cleaner
Now with a cloth (preferably microfibre) and glass cleaner, wipe the window squeaky clean! You can use a mixture of vinegar (or rubbing alcohol) and water as an alternative to the glass cleaner.
Even a soapy solution of water and dish soap will do just fine. Do not use paper or paper towels. They leave much fibre on the glass surface and will make your window look greasy again.
Tools: microfibre cloth or sponge, a mixture of vinegar or rubbing alcohol and water or dish soap and water
STEP 9: Clean The Insides Too
Since you’re at it, it will be a good idea to clean the inside face of the window as well. However, you should keep in mind that different materials are to be used for the different sides of the window when the window is tinted or filmed.
The indoor surface has been picking up all kinds of dirt and filth from the outside. Using just a sponge will only make things worse. Investing in a set of cleaning materials designed solely to clean the windows can prove efficient at times like this,
However, using a plastic scraper or razor blade can do the trick for now. Be cautious if you’re using a razor blade. This will help in removing the stubborn build-up. Now with the water solution, rinse it thoroughly.
STEP 10: Clean It All
After the two faces, make sure to clean the edges, the window frames, and the tracks as well. Their structure makes them an inevitable dust collector zone.
Cleaning windows thoroughly might not be on your list of daily chores, so it’s better to get it deep cleaned when you’re at it.
Using the same solution will be fine. Be sure to get into the very small spaces with a toothbrush or any kind of stubborn brush. A lot of scum builds up in those tiny spaces.
STEP 11: Polishing The Glass (optional)
If the condition of the glass is worse than you thought, getting it polished professionally can be a better choice.
You can also DIY with a glass polishing compound. This is similar to the ones used for polishing car windows and headlights.
Make sure to apply the compound on a clean, preferably microfibre cloth, and wipe the glass with it in a circular motion. Leave it to dry for about half an hour. Finally, buff it with another clean cloth.
Supply:
- NA
Tools:
- Hairdryer/Heat-Gun
- Plastic Scraper (Optional
- WD-40 Or Any Other Glass Cleaner In A Spray Bottle
- A Mixture Of Vinegar Or Rubbing Alcohol
- Water Or Dish Soap And Water
- Toothbrush, Or Any Other Hard Brush
- Glass/Car Polishing Compound
Materials: NA
Causes Of Hazy Windows

1. Rain
Pollution, global warming, all of the environmental hazards lead to acid rain. The spots of acid rain are much worse than regular water spots. The mineral and chemical content in those droplets stain the glass in the worst way possible. Getting rid of such stains isn’t easy but still possible.
A solution of water and vinegar or rubbing alcohol can be your friend. Pour this solution in a spray bottle for even application. Now wipe the stains as firmly as you can with a microfibre cloth.
2. Water Spots
Normal rains are still on the list of causes. Water spots might not be as hard to wipe clean but they still do stain your windows pretty badly. Although they are not as stubborn as tough acid stains. A mixture of vinegar and water (more diluted) can do the trick.
3. Ice
The snowing countries have it the worse. Ice can stick on your glass and haze it up completely. The whole window is stained as a result. One might think chipping away the ice is the only option, but it will only make things worse.
Not to mention it can even break the glass. Using rubbing alcohol is just the hack you need. The rubbing alcohol can dissolve the ice build-up and itself gets volatilized, leaving your window very clean.
What Causes Film On Inside Of House Windows?
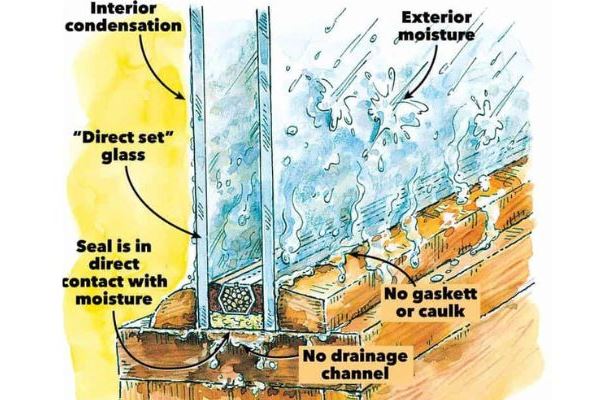
Many people might not know it but your window panes aren’t air-tight. They were made to enhance the thermal performance of the windows. This is done by trapping the air inside a created space. Window films come in two different layers, double or triple. The more layers, the better is the thermal enhancement. But a problem arises when the trapped air is humid. This humidity will cause water molecules to build up in the space. These will dry up and stain the inside of the window films. You can easily avoid these strains by using wirelessly connecting window blinds to cover your windows from the outside.
How Foggy Film Covers The Window Glass?
There happen to be several reasons for a foggy film to occur.
a. Condensation
More often, the temperature inside the house is much lower than on the outside, especially in warm countries. Most houses having air conditioners experience foggy windows when the temperature is very high outside and very low on the inside. Regular condensation leaves the window films foggy.
b. Mineral Build-Ups
The water molecules in the air often have high mineral content. After sticking to the windows, the water evaporates and the minerals are deposited on the window film.
c. Deterioration Of Window Seals
All windows dim with time. The window seals lose their nature. This can also be the reason for foggy films on your window glass. Get a nice window sealing kit to avoid the foggyness.
Can It Harm The Window Glass Front?
Over time the build-up of fog and mist can seriously degrade the glass quality. Not only the glasses will lose their visibility but also the material degrades over time. All things are prone to degradation. Water and mineral deposits only speed up the process. Hence deep-cleaning your windows on a monthly or bi-weekly basis can prolong the glass.
Moreover, if you’re planning to get one, make sure to buy a good security film for your office windows to secure yourself.
Final Talk
Windows become our escape sometimes. Looking up at the blue sky or down at the passer-byes is often more fun than endless scrolling through social media feeds. Our minds become clear while observing the world through these windows. Don’t let stubborn spots and stains ruin your quality time. Use our in-depth guide and enjoy a warmer and clearer room and house.


Leave a Reply