Many of us have been lying on the floor, attempting to connect a computer cord to the floor’s power strip. This is inconvenient, especially among the elder citizens or when troubleshooting an issue that necessitates repeatedly plugging and removing the cord. We’ll show you how to mount the power strip on the wall or on furniture at a convenient height for easy access to the power source.
Methods To Attach Power Strip On Wall
Quick Navigation
1. Choosing A Power Strip
Finding the least expensive energy provider, commercial energy pricing, and how to lower your power bill are all common energy problems. Let selecting a power strip be the last thing on your mind.
If you’re acquainted with your options, choosing the correct power strip can be difficult, so follow the tips below to aid you.
The number of outlets: Have a power strip that allows you to plug in as least as many gadgets as you wish. Transformer plugs are greater than usual, and several power strips have enough room to accommodate them without obstructing nearby outlets. Connecting a power strip to another power strip is not a good idea. This is an electrical threat that could result in a fire.
Length and configuration: Determine the distance between your power strip and the outlet, and select a power strip that is at least as long as that path length. Regular, front-facing, rear-facing, side-facing, and end-mounted plugs are available.
Type of equipment: Choose a power strip that matches the instruments you’ll be using and the surroundings you’ll be working in. A power strip for workstation tools isn’t the same as one for office supplies, a laptop workstation, audiovisual equipment, or medical instruments.
Consider extra safety: Evaluate whether your use necessitates additional safety measures. Many power strips have all-metal housings, which are virtually unbreakable. 15- or 20-amp circuit breakers are another safety element that avoids a system overload. There are various variants that are used near water to avoid shock, such as GFCI; if the device short-circuits, the electrical circuit is immediately terminated.
Surge protection: You can use a surge protector instead of a power strip. They may appear to be the same, but they serve different purposes. A power strip provides several ports from a single outlet, whereas a surge protector safeguards your plug-ins from power surges or other power line interference.
2. Power Strip Installation
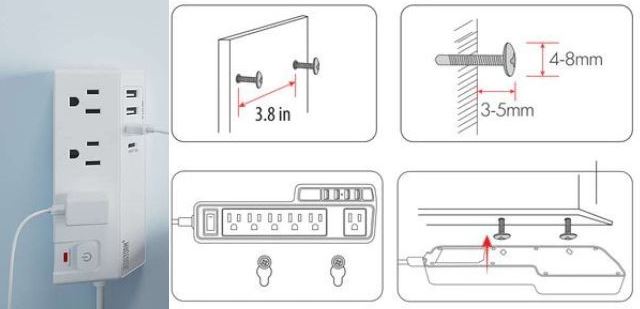
Step 1: Make a mark where you’ll put the screws. Marks can be made with a pencil or any other type of marker. Make sure they’re on the same page. To be more explicit, the gap between the centre of the holes on the power strip and the centre of the screws should be equivalent.
Step 2: Place the power strip where you want it to be mounted on the wall. Grip it in place by using one hand to hold the nails and the other to press it onto the wall. Make sure it’s level and draw a line where you’ll drill the holes.
Step 3: With the help of your pencil, mark a line on the wall where you will punch the screw holes.
Step 4: Make the holes with a drill. Make certain that all of the screws are at the same level.
Step 5: Install the wall’s power strip and secure it with screws. Check that it is securely fastened and tighten it if necessary.
That’s all; you now know how to install a power strip on the wall. Although it may appear tough at first, it is a very simple procedure.
Supply:
- NA
Tools:
- Screws
- A Drilling Machine
- Power Strip
- Pencil
- Masking Tape
Materials: NA
How Are Power Strips Beneficial?
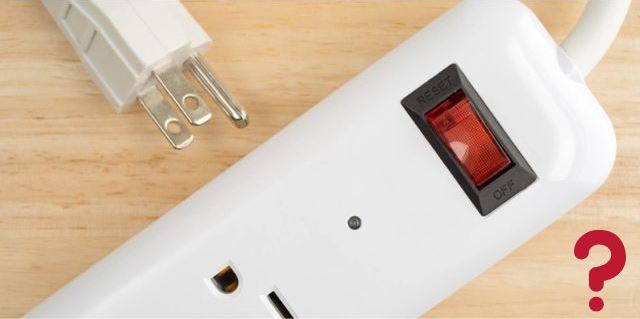
Power strips come in handy when you have multiple surrounding electronics that need to be connected to an outlet. They provide efficiency and convenience,
which are qualities that typical household outlets lack. Power strips include many outlets, making them suitable for charging multiple gadgets simultaneously.
These extensions give a convenient option for people who need to power multiple items. Many power strips have an on/off switch, which is ideal for energy conservation. They are also fairly priced. However, the price varies based on their functions.
Hazards Of Power Strip
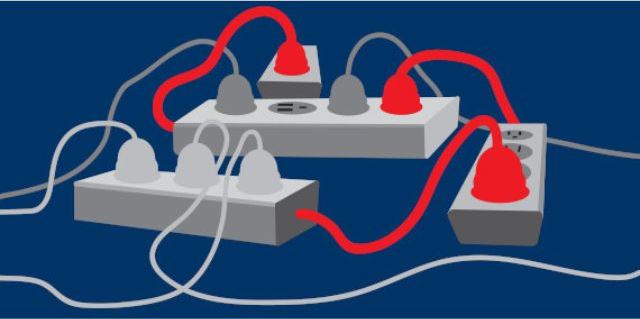
Plugging a Power Strip Into Another Power Strip: It’s tempting to connect numerous strips together, chaining them by connecting one into the next if your power strips don’t stretch far enough or you require additional sockets.
Do not use power strips outdoor: Since there are power strips built expressly for outdoor usage, until your strip’s labelling specifically states that it is, it is not designed to withstand weather and water. Keep it indoors until you can find one that can be used outside safely.
Overloading of power strips: Each power strip has a load capacity, meaning it can only move a certain amount of power across its circuits at any particular time.
Overloading the strip might cause a fire, burn the plastic, and cause damage to your home or office and any nearby equipment.
How Do You Attach A Power Strip To The Bottom Of A Desk?
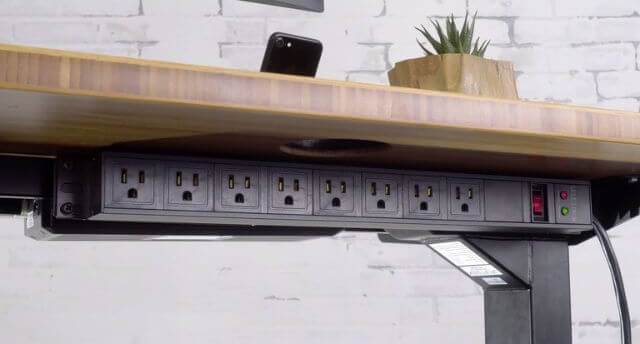
Your approach is determined by how much energy you would like to put into it, the material your deck is made of (whether it is yours or your employer’s), and the style you want to achieve. you will need some tools to attach a power strip to the bottom of the desk.
Step 1- Start with a clean slate: You undoubtedly already have a few things plugged in at your desk, or you want to clean up a cluttered workspace. Unplug everything! Remove as many cables as you can from their connectors and place them away, keeping note of which cable leads to which gadget.
Step 2- Power strip placement: Your configuration will determine where you can most silently install your power strip and how everything else fits along.
As a result, choosing the best location for your power strip is critical. The bottom of the desk or the wall behind your desk are two of the most frequent, inconspicuous, and effective places to attach your power strip, but you may also hide your cables well on the bottom if necessary.
Step 3- Make Your Desk Cable-Friendly: Now that you’ve determined how your power strip will sit, you’re thinking about how you’ll route your cables.
Some desks come with pre-installed cable management solutions like holes and grommets; if this is the case, you’re already ahead of the game. These are simple features to add if they aren’t already there.
Step 4- Cable prep: One of the most critical aspects of cable management is ensuring that your cords have no extra slack. To do so, you’ll need to do some preliminary work: gather your cords and/or use a measuring tape to determine how much cable each connection requires.
When you’ve reached that length, wrap up any excess cable and secure it with a tie.
Most cables come with twist ties, and you can think of using these or a plastic zip-tie to coil the cord around.
However, I would advise against using them because twist ties aren’t always the greatest and zip ties can’t be removed unless they’re cut. Instead, use velcro cable ties, which are robust, low-profile, and easy to use.
Step 5- Assembling: You’ve organized your workspace, cleared your desk, and wrapped your cables to the proper length. Now it’s time to connect everything and make sure it’s tucked safely. You can do a few things to help your cables reach their target without becoming a nuisance at this step.
Most essential, you’ll want to invest in some adhesive cable clips to keep cords in position before they enter your main bundle.
You can use binding clips on the edge of your desk to direct your cords if you can’t find any of them or don’t like the thought of using adhesive.
Gather your cable sleeves and group any cables that are close together once you’ve gotten everything you want. This can assist keep specific types of wires grouped for easier access and will reduce any visible evidence of cables. If you want to go beyond, you may attach these to your desk or wall with clips or nails. You can also have a remote control power strip outlet to control all your home appliances remotely.
Final Talk
Even if society is shifting toward wireless gadgets, and support for them has grown over time, things still need to be plugged in at some point – even if it’s just to recharge. This is especially true at your workstation, where most charger-dependent devices are likely to be found. Even if you simply have a few cords, keeping that space uncluttered is crucial so you can be productive.
It doesn’t have to be tough, time-consuming, or complicated to achieve that perfect, visually beautiful cable configuration. You can have that stock-photo-ready workstation of your dreams with the five steps we’ve provided. And believe me when I say that you’ll thank yourself later when it comes time to update, replace, or just transfer one of your gadgets. So, are you ready?




Leave a Reply