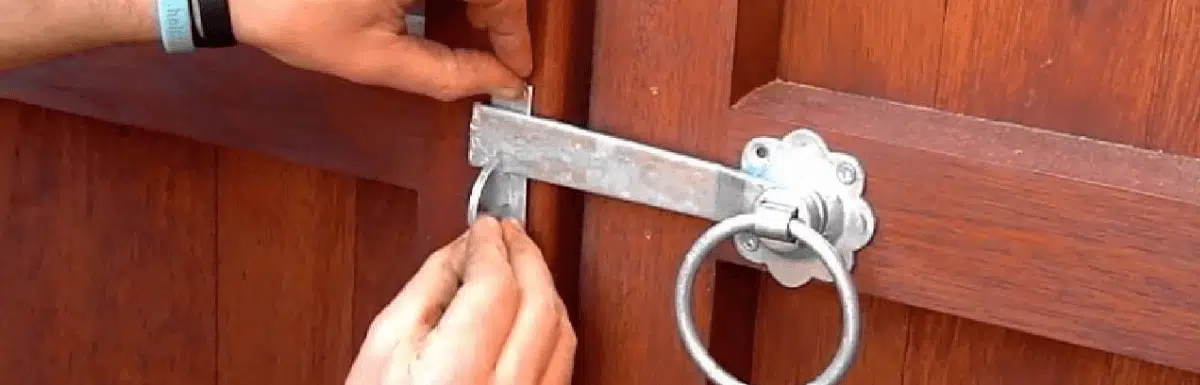
A gate latch is a device that is used to control the opening and closing of an exterior gate. It consists of a metal bar with a hinged arm at one end and a hinged arm at the other end. Drill two holes in each side of your gates, according to the size of the latch, where you want your latch to go. Take the latch out of its packaging and remove any tape or plastic. place the latch on the gate and align it with the top of the gate post. This guide can help to install gate latch.
Methods To Install Gate Latch
Quick Navigation
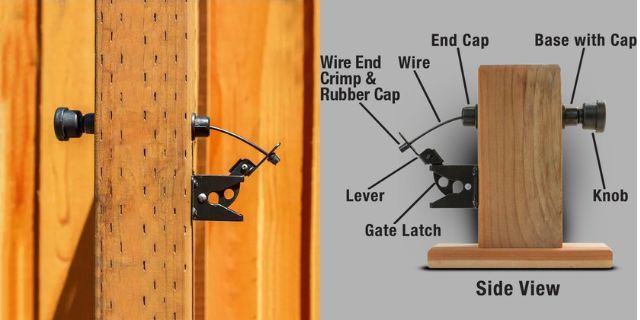
Gate latch cables are an integral part of any gate. They can keep your home secure and help to prevent children or pets from wandering away. Installing a gate latch cable is a great way to keep your gate from swinging open and It’s not as difficult as it may seem.
You can install it yourself, in just a few steps:
Step 1: First, remove the hinge pin from the gate using a hammer and punch or drift pin. This will require someone to hold the gate up for you so that the hinge pin does not fall into the ground.
Step 2: Then, measure the distance between your fence post and the edge of your gate. Measure this distance on both sides of the gate so that you know how much cable to purchase.
Step 3: To install your cable, tie one end around one of your fence posts. then run the cable along its length through the holes in each fence post until you reach the gate. Make sure that you have enough slack in your cable so that the gate can open and close.
Step 4: But not so much slack that tension cannot be maintained. Tie off the other end of your cable around your last fence post. Then insert a new hinge pin into your gate using a hammer and punch or drift pin.
Now, your gate is ready for use!!
Install Different Types Of Gate Latch
1. Self-Adjusting Gate Latch
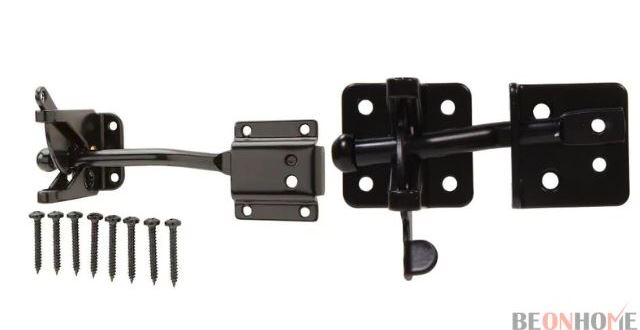
Installing a self-adjusting gate latch is a great way to ensure that your gate is always latched. A self-adjusting gate latch is a tool that makes it easy to open and shut a gate without having to adjust anything. It’s designed to adjust itself base on what you’re using for your garden. Whether that’s wood or metal—and it can be installed in just a few minutes!
Here are the steps to install one:
- Measure from the inside of the gate post to the inside of the gate, along the top part of the gate. Write down this measurement.
- Measure from the top of the gate post to where you want the latch to be installed on your gate. Write down this measurement.
- Lay your self-adjusting gate latch on a flat surface and measure its full length, along its top edge. Write down this measurement.
- Subtract half of the measurement in Step 3 from both measurements in Steps 1 and 2.
- Now, write down those new measurements as your X and Y measurements, respectively.
- Drill pilot holes for screws at X and Y .
- These will be used to attach your self-adjusting gate latch to your fence post and your fence.
- To drill these pilot holes, use a drill bit that’s slightly smaller than your screw size.
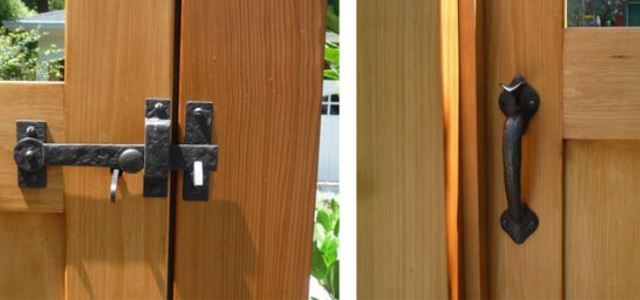
2. Gate Latch Pull
A gate latch pull is a metal loop or handles that attach to the post on your gate. It’s part of the hardware that allows you to open and close the gate. Gate latch pulls come in all shapes and sizes, but they all have one thing in common.
That they’re used to open your gate and keep it securely closed when not in use. It is used in instances where there are gates and those gates need to be latched shut. . The tether or chain can be pulled back and forth to open and close the gate.
Installing a gate latch pull can be simple. Once you know the process and tools required, you will be able to finish the job in a matter of minutes.
Here is a step-by-step guide to help you install a gate latch pull with ease:
- Determine the position of the Gate Latch pull, and mark the location for the screw holes with a pencil.
- Drill a hole in each marked location using a 1/8-inch drill bit.
- Insert screws through the holes in the latch pull and into the drywall until they are flush with the latch pull.
- Place a drop of super glue on each screw head, and allow it to dry before opening or closing your gate pull.
3. Gate Latch Hinge
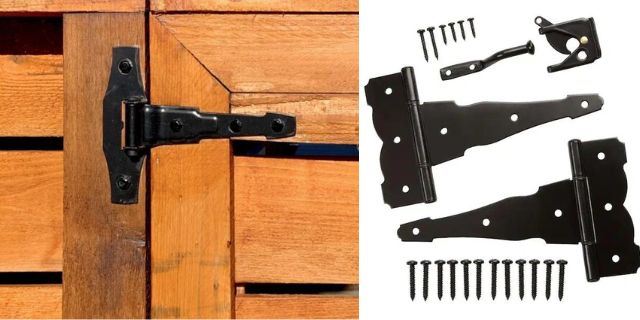
A gate latch pull is a metal loop or handle that attaches to the post on your gate. It’s part of the hardware that allows you to open and close the gate. Gate latch pulls come in all shapes and sizes, but they all have one thing in common. They’re used to open your gate and keep it securely closed when not in use.
A Gate Latch pull is a pull used in instances where there are gates and those gates need to be latched shut. This pull is used to latch the gate shut. It’s done By pulling the tether or chain on the end of the pull and hooking it into the hook on the gate. The tether or chain can be pulled back and forth to open and close the gate.
Installing a gate latch hinge can be tricky. But use our step-by-step instruction guide, and you’ll be closing your gate like a pro in no time.
- First, take off the old gate latch. If you have any trouble with this step, don’t worry!
- Your new Gate Latch hinge comes with instructions on how to remove your old one.
- Next, put on your new Gate Latch hinge. This is where your instructions and the included tools will come in handy.
- Finally, test out your new Gate Latch hinge! Close the door to see if it closes all the way.
- Open the door to see if it opens all the way.
- If it doesn’t close or open all the way, try gently adjusting it using one of the included tools until it works!
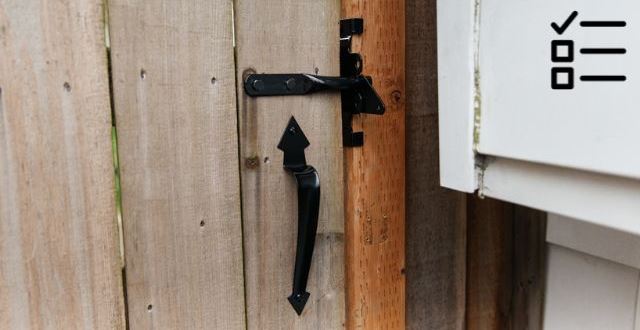
4. Gate Thumb Latch
Installing a gate thumb latch is a relatively simple job, but you’ll have to be patient and work carefully.
Learn how to install a gate thumb latch with these simple instructions.
Step 1: Read through this article to make sure you understand what each step means before you start.
Step 2: Make sure that your tools are in good working condition and that they’re near you. You don’t want to get halfway through a project just to realize that you need a new pair of pliers, right?
Step 3: If your gate is less than 9 feet wide, start by removing the fence line post.
Step 4: Cut the posts using your saw and finish them off with sandpaper. This will give them a smooth surface and protect them from weather damage.
Step 5: Hammer the gate latch into place on both sides of your fence line posts. Now, attach it with screws or nails (depending on what type of wood you’re using).
You can just put on a multipurpose smart gate lock to substitute for gate latches.
Install On Different Locations:
1. Wood Fence
Installing a gate latch on a wooden fence is a quick and easy process that can be done with a few household tools.
- Choose a latch that matches the style of your fence.
- Determine how far from the ground you want to install the latch.
- Drill pilot holes for the screws on the back side of the gate and post.
- Secure the latch to the gate with screws, making sure it’s level and centred with the post.
- Use a drill to make holes in both sides of the post for the installation of the latch’s lock mechanism/handle.
- Install lock mechanism/handle in place on both sides of your post.
- Make sure they line up with each other when closed together.
Why it is necessary to install a gate latch?
There are many reasons why it is necessary to install a gate latch.
- The most important reason is that it is the best way to keep your home safe from intruders. The installation of a gate latch can help keep your home safe from burglars and other unwanted visitors. It also helps prevent accidents from happening by keeping children away from danger.
- It is also important for security reasons since it keeps your home safe from burglars. For example, if there is a break-in, the gate latch will be able to stop them from entering your home or carport. This will prevent them from stealing anything inside these areas which can save you lots of money!
- Additionally, installing a gate latch will help prevent accidents when children play outside on hot summer days because they won’t be able to get inside easily without permission.”
- Moreover, a gate lock is a must for your vinyl doors.
FAQ
What is the proper height for a gate latch?
The proper height for a gate latch can be hard to determine. The most important thing is to make sure that you can reach it easily with one hand without having to bend or strain yourself. If the latch is too low, it might make it difficult for you to lock or unlock your gate quickly if you’re in a hurry.
The next most important thing is to make sure that you can reach the latch from inside your house or car when the gate is closed so that you don’t have to get out of your vehicle every time someone wants to access it.
The final consideration is aesthetic appeal: if possible, try to choose a latch that matches the style of your gate and other fixtures on your property.
Should a gate open in or out?
The answer depends on what type of latch you’re using. If you’re opening an old-fashioned pin tumbler lock, then the gate should open in. When you push the key into the lock and turn it, it will push all of the pins on the bottom of the cylinder out of their slots and release tension from the bolt. The gate will swing open once this happens.
Final Talk
We hope this blog has helped you better understand how to install a gate latch. The process can be tricky and time-consuming. But proper installation is necessary . If you’re still having issues, it may be time to consult a professional.


Leave a Reply