In today’s lifestyle, it is all about convenience. A garage door opener offers you the right of that. With multiple benefits, Garage door openers are massive. Also, opening and closing them every now and then is a herculean task. In this article, we will be covering how you can install the garage door opener all by yourself. This is going to be step by step guide, so keep reading and follow through.
Pre Installation Process
Quick Navigation
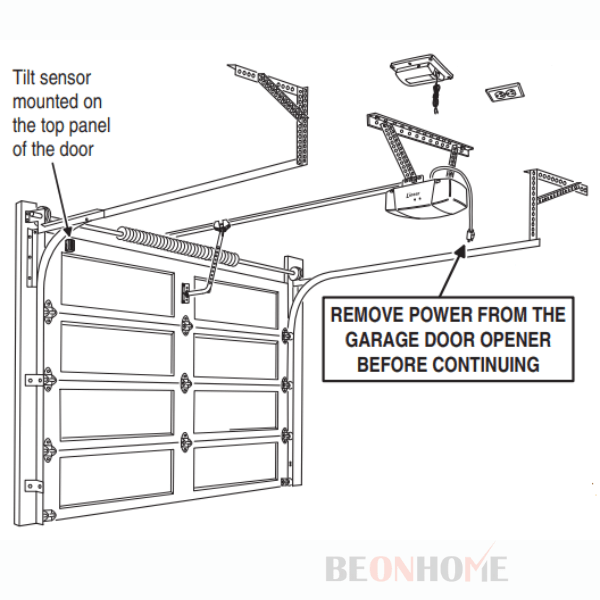
Step 1: Assessing The Door You Have
Firstly you might want to have a look at your garage door. Most of the new doors are compatible with these openers. They come in with multiple horizontal sections in the function. Unlike a traditional single-piece garage door. If you find that the door you have currently is not compatible, consider a change.
Step 2: Choosing A Door Opener
Now the decision-making must be thorough and well thought out. While buying a door opener, make sure you look for all the specifications carefully. The door size and weight are something to consider. Look for extra features which differ from one supplier to another.
Step 3: Preparing The Door
Once you have looked into all the details and found a supplier, prepare the door. Well lubricate the door and check for little components. Springs and rollers should be well checked. If your door is making major noise then there might be an issue with the rollers.
If you find the spring has broken then change it immediately. If your door has two springs and one of them is broken, also change the other. The other may as well break soon.
If rollers have gotten wobbly then get new ones. You should go for nylon ones as they are slightly less noisy. Do check for the bottom bracket as well. If you find it faulty, take help from an expert. The bottom bracket is under extreme pressure and doing it by yourself is risky.
Step 4: Electric Plug
For the installation of the door opener, you will require an electric plug on the ceiling. The opener compartment will need to be plugged into it. It is rare to have a plug on the ceiling so call an electrician and get one installed. You may do it yourself if you want to.
Step 5: Door Balance
You should also check the door balance too. Leave the door mid-way up, and leave it. If it moves up or down on its own that it is imbalanced. This indicates misalignement of torsion spring. Align it with an expert’s help. Aligning it by yourself may prove to be dangerous.
After alignment, you will see that the door stays where you leave it. Neither moving up nor down, now is the time to move ahead. As up till here we have now made sure that the door is ready for the opener, now let’s install it.
Installation Process
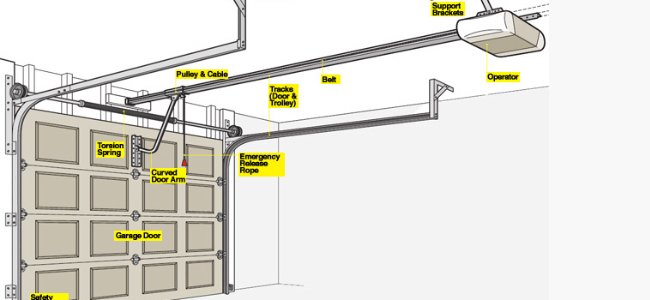
Step 1: Line Up
Now after you have received your gate opener kit, you should first unbox it and line up all the items. Check for a list of all the items included. Now cross check if you have received all items correctly or not. Also, make sure that all the pieces are in a good condition and have no defects.
Step 2: Assembling Carriage Tube
Now you can start with assembling the carriage tube. It comes in several small parts start by screwing them to each other. Once you finish attaching them all, you will see that it is a very huge piece. Actually, it is the largest piece of the entire kit.
For attaching, do refer to the manual provided. Check if the length of the piece matches the required length mentioned in the manual. Make sure you secure the joints carefully.
Step 3: Mount The Carriage Tube
You should now attach the carriage tube to the power unit. After attaching the carriage tube to the front of the power unit, attach rail clamps to the other side. The carriage tube is also called the rail, which will function as the base for the carriage to move.
Step 4: Slip The Carriage Over The Tube
After you have mounted the carriage tube to the power unit, slip the carriage over the tube from the other end. Attach the clamps and match the process with the manual. In different models, the attachment may differ.
Step 5: Blocking On Ceiling
If you don’t have blocking installed on your ceiling already then drill in one by yourself. You will need it for attaching the power unit to the ceiling. Make sure that you drill it in solid wood and not in the sheetrock. You don’t want it to fall to the ground.
Step 6: Header Bracket
After this, attach the header bracket to the door. Generally, it should be attached to the top of the door and in the middle. See the maximum height your door reaches when it is opened. From there mark 2 inches up. Now keep the bottom of the bracket over the marking
Step 7: Connect Bracket And Carriage Tube
Now the end opposite to the power unit should be attached to the bracket on the door. While doing so ensure that the power unit is placed on a stool or something which keeps it secure. Alternatively, you can ask for someone’s help to keep the power unit safe.
Step 8: Installing Power Unit
It can be a bit intricate. If you have easy access to it, then call for some help. You can do it by keeping the power unit on a ladder but it would be easier with human help. While it is kept up by any means, screw it to the blocking on the ceiling. Attach the pin into the ceiling plug.
Step 9: Connecting The Carriage Tube And Arm
Now you can put the bracket in place that attaches the carriage tube and the arm. With this bracket in place, when the carriage moves, the arm also moves. Causing the door to open and close. And with installing this we have almost completed the installation of the opener. The opener is now functional, but before you test it do the last step.
Step 10: Installing Safety Device
It is compulsory to install a safety device, and so should you do. The safety device is a pair of sensors that emit and receive light signals. If anything obstructs the path of the light, the motor immediately stops and the door goes back. This way most of the accidents are avoided. This is especially helpful for houses with pets and children.
Post Installation
Feature 1: Safety Rope
In addition to the safety device, your opener already has an inbuilt manual rope to stop the motor. All you need to do is to extend the rope to a level reachable with your hand. A height of 6′ or above is perfect. At this height, it will stay away from curious pulls and also be reachable in times of need.
Feature 2: Light Bulb
You might be thinking as if this wasn’t obvious enough. The point we need you to know is that there’s a different light you may want to use for your opener. Buy and install a light which is rated ‘rough service’. A normal bulb might not be able to stand up the vibrations. A rough service bulb is made for such usage. A bulb with light also serves the purpose of signalling changes in the programming of the opener.
Feature 3: Electric Eye Safety
As electric eyes are super sensitive, even a minor spider web will also affect their working. To ensure that they work in the best condition, install electric eye safety. This is included with most of the openers, wire them as instructed in the manual.
Feature 4: Test The Door
As we have already put everything in place, now you should test the door. If the door is making noise, don’t get worried, it usually does. Now while doing this pay attention to the opening and closing force, and adjust it properly. If you have a reversing door, address the issue right away.
Installing A Garage Door
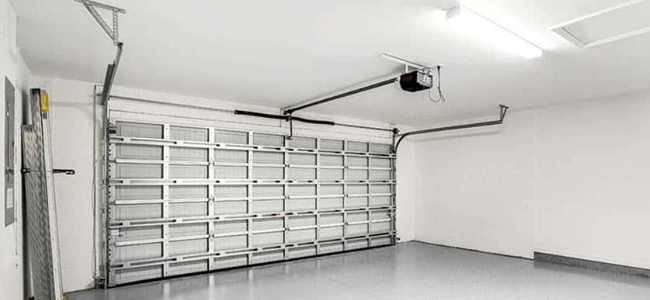
As we have discussed the installation of garage door openers, it is important to know how to install a door.
Now when you buy a door, the supplier will generally also provide for the installation. Some may even do the installation free of charge.
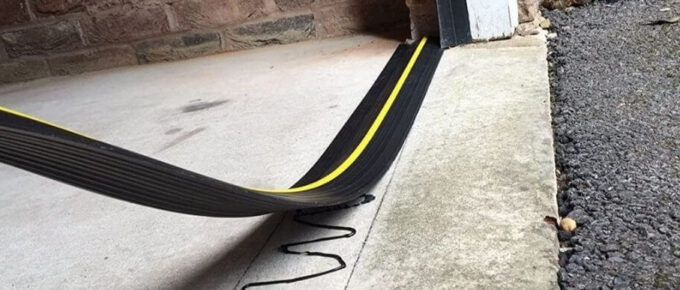
- Start by laying the weatherstrip on the bottom door panel.
- Mount the bracket over the weatherstrip. A bracket for both the lower panels.
- While installing the bottom panel, make sure that it is as centred as much as possible. Use a measuring tape if you need it.
- Install hinges on the top of the door panel. You will require 3 of them.
- Install rollers in the hinges and brackets.
- After you put the wheel in place, wrap it with the track.
- Screw the track to the door panel.
- Now repeat the same process for the second panel. You can leave one hinge unattached. This will make it easier to install.
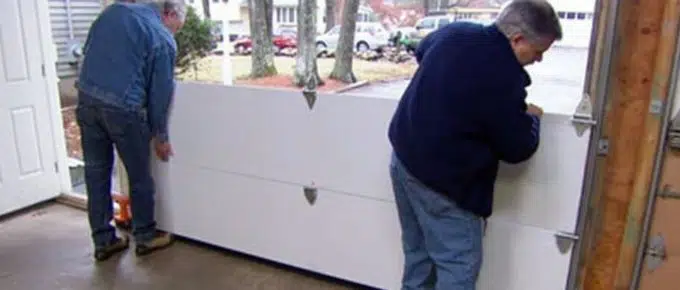
- Ask for a friend’s help to lift the panel and put it in place. After that fasten the hinges and also attach the left hinge.
- Attach the second track to the other side of the door. And connect the vertical track to the horizontal track section.
- Bolt the track section securely. After that place the other door panels. After all the panels, align the track with rollers and top hinges.
- For attaching springs, you should call for an expert. But if you are determined to do it by yourself, here you go. Lift the door up and lock it in place. Install a torsion spring and a bar. To build the required tension, use a drill. This will provide you with a sturdy lifting system.
How Long Does It Take For A Professional To Replace?
The answer to this question is subjective. Different people and different door lengths and weights will affect the time taken. For an average 16 foot door, typically it will take 3-4 hours to replace it completely.
If some parts like tracks or weatherstrip are usable, then they may reduce the time taken. Also, other factors such as the weather of the day or other matters are sure to have an impact on the work.
How Hard Is It To Install?
We are not boasting, but with this article, it may be called a piece of cake. The step-by-step mentioning of the process has made it seem easy. If you have any other previous experience in doing such work all by yourself then it is obvious.
If you are intermediate then this will enrich you with a great experience. And if you are figuring out your way, then take some help. Help from someone like you, or an experienced person, your call.
It is, to be honest, is neither an easy nor a hard job. nature depends on you and your experience. Even if it may sound hard to do, it is doable. You will be able to save quite a few hundred dollars by doing this by yourself. Not to forget the experience and confidence gained from this achievement.
Recommended Products
To help you navigate your way through the door opener range, we have shortlisted a few of them.
a. Best Overall
The kit includes two pre-programmed remotes and has smart functionalities. It has a powerful motor and is also loaded with a good battery backup.
b. Budget Kit
is a must mention in the list of best kits. Available on Amazon at an affordable rate of $150, it is one of the options to consider if you are tight on budget.The kit also goes in hand with this article. This is specially designed for do-it-yourself installation. An in-built led light is provided too.
c. Smart Door Opener
Drive Garage Door Opener is worth a look. With this, you can control your garage door with your mobile phone. The opener is connected to wi-fi which enables it to receive your command. This door opener is available at an average price of $289 on amazon.Final Talk
With this article, we hope to have helped you in the way you needed. Most of the work can be done by yourself. Some other works are better to be get done by experts as they are risky to do if you are inexperienced. Now look for the door opener which works for you and buckle up for the project.




Leave a Reply