If you are troubled with the Roomba vacuum clean button not working, this is the perfect article for you. In this article, we have taken different models of the Roomba vacuum: the i7 Roomba, 650 Roomba, e5 Roomba, 600 Roomba, and 560 Roomba models.
Although, the troubleshooting steps for the clean button not working are not much different for all these models. Therefore, in the very first section of this article, we have also given some solutions to tackle common issues.
How To Fix Roomba Clean Button Not Working?
Quick Navigation
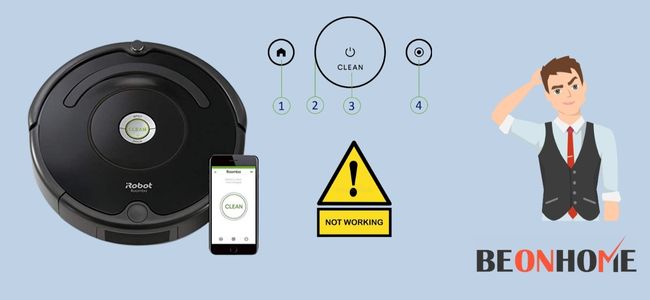
The “CLEAN” button on your Roomba device is one of the most important things. If it doesn’t function, it can be because of several reasons.
There are many software bugs or it can be because of defective batteries. These things affect the conductivity of the Roomba devices. It will also stop working if the charging contact and buttons are worn out.
Follow the steps one by one; we are sure you will be able to find the best solution for your issue.
1. Check The Batteries For Defects
When your cleaner’s batteries are drained or faulty, they will not function correctly. The first step is to ensure that the correct batteries are installed in the system.
You can also check the same with the help of indicator LED lights. The light blinks when you press the clean button. If it does not turn on, it is time to replace the batteries.
In some conditions, issues may happen when the component is not able to hold any charge. This can be worked out by cycling and resetting the unit. For this method, firstly, you should eliminate the batteries.
Then you should push down the clean switch for 5-15 seconds. Now, put in the battery and start charging. The Roomba will indicate green or white light, depending on the unit.
2. Power Cycle Or Reset Your Roomba
Power cycling is the procedure of turning a portion of the appliance off and after that on again. It is a simple reboot procedure that you regularly do with our devices. You can utilize the exact technique here.
You have to turn off the Roomba by eliminating the power source. Now, wait for 15 – 30 seconds, and then you can start the device again. This comes across to be working for several users. There is a chance that this may work out for you as well.
3. Clean Dust Out Of Your Roomba
Your cleaning equipment requires cleaning too. Every part of the device needs to be cleaned. The process may vary depending on the model, whether it has touch or mechanical buttons.
It will be a little hard to clean the mechanical buttons, but it is essential. The clean button will not register when you push it if it has dirt caught inside. This can cause multiple issues like the bin not being detected. This issue can be solved by simply vacuuming and dusting.
4. Clean Its Electrical Contacts
Cleaning the electrical contacts is also very important for your Roomba. If it is dirty, it prevents it from charging or docking correctly. Since you’re handling electrical connections here, you must do your cleaning carefully.
It is usually advised to clean them with a damp melamine foam, or you can also utilize a dry cloth. You should turn the Roomba upside down and mop the connections gently.
Do the same thing for the house base as well. You may have to toil a little bit to clean the gunk off. But continue your work and ultimately, everything will become crystal clear.
5. Clean Filter
You should always make sure that Roomba filters are excellent and clean. Even if you are not using your Roomba, frequent cleaning is essential.
Anything can get easily clogged in the filters. This may also cause overheating of the robot, thus decreasing its performance.
For cleaning, you should remove the dustbin and empty it. Before you place it back, you should remove the filter. The procedure of filter removal differs with different models of iRobot.
Removing debris or dirt can be done by lightly tapping the filter against the junk. You can, moreover use compressed air to clean the filter.
6. Contact Customer Support
Contact customer support if you have tried every method and none seem to work. You have to understand that some things are beyond our management. You may call customer care through a toll-free contact number or email them the problem.
Hopefully, they’ll contact you back. In any case, customer support will have more experience and better knowledge.
You should make clear your specific brand number and the model. Then, you should explain the problem in detail. The experienced consultants will surely lead you through all the points.
7. Replace Your Roomba
Lastly, the most sought and simple option is to replace the Roomba if it’s faulty when received. In many cases, buyers obtain damaged ones that do not work correctly.
In this situation, you contact the supplier directly. Explain the shortcoming and request a replacement. They will send someone to check the problem and ensure a replacement if required. You should make sure while doing so that you possess all the essential documents at hand.
Fix i7 Roomba:
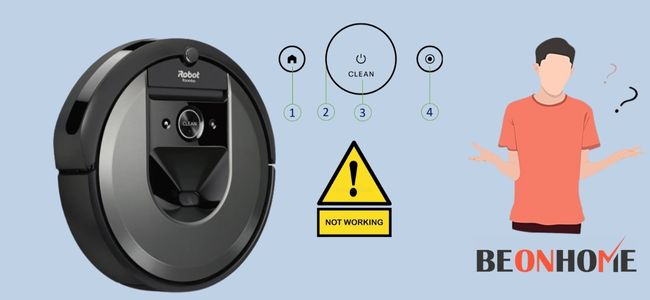
This section will give tips to fix your i7 Roomba clean button not working . Although the troubleshooting tips for the clean button not working are widely the same for all Roomba models. Therefore, we advise you to try all the above steps we have provided in the first section of this article.
This section includes the battery and charging issues of the Roomba device. After this, you can follow the specific detailed procedure given below if that does not help. Let us get started with the steps:
1. The foremost thing you must do is the cleaning of your Roomba device’s charging contacts.
There are 4 charging contact points that you must clean:
- Two at the bottom of the Roomba device.
- Two at the docking station of its Home Base.
Remember that charging contacts are susceptible. So, you should ensure that it is cleaned with only a melamine foam or a microfiber cloth. By doing this, you can prevent the contacts from scratching.
2. After this, power-charge your Roomba vacuum.
For this, you must leave your Roomba on its Base for about 24 hours. Also, you must check if your device’s Home Base charging contacts have been damaged. You can charge the device directly to the power source in this situation. You can utilize the power cable present in the Home Base.
3. Replace your Roomba battery if it’s defective.
There’s no way to troubleshoot an impaired battery. If it is defective, you have to somehow replace it with a new one at the end. The battery becoming defective after prolonged use for a year or so is very common. It happens because of reasons like:
- Over usage.
- Electrical circuits.
- Power surges
- Battery corrosion.
As we have told you before replacing them is the only solution, you can proceed with the same by considering the following steps:
- When purchasing one, ensure that you get an iRobot-certified battery for safety on such products of guaranteed quality.
- Make sure that you get a battery that applies to your Roomba model.
Here we have sorted out some steps to help you out with the replacement of the battery:
- Turn your Roomba device upside down.
- Unfasten the screws of the lowermost cover. Eliminate the side brush.
- Unclip the initial battery.
- Then, place the bottom cover and also the side brush. Now put in the replacement battery.
Please note that the device’s vacuum will generally deactivate after 15 minutes of battery removal. So, you should keep your replacement handy while doing this.
Fix 650 Roomba:
The fixing of 650 Roomba models is not that different from the given detailed guide above about the same.
Again follow those steps with care as it deals with nearly all the issues. You may also follow the battery check-up step provided above.
If still, it doesn’t help then the battery isn’t the problem; hardware problems must be the reason. This is also one of the most common causes behind the Clean button not working on 650 Roomba.
When Roomba wanders over your whole house, it is normal to contact numerous dirt and occasionally liquids.
But a Roomba vacuum device is not constructed to get in contact with any liquid. This may harm the hardware of your Roomba, mainly its printed circuit.
The circuit board assures that there is electricity in the whole Roomba system.
Therefore, when it gets harmed, the Roomba does not work correctly. It may also fail to obtain or comprise electrical charges. And without any electric charge, the “CLEAN” button will not work on your Roomba vacuum.
Since you now know the reason here are some tips you can use to fix this problem:
- Fixing harmed PCB is complex. It needs technical knowledge about electrical subjects and PCBs.
- So, if you’re not an expert on it, it would be best to bring your device to a service center.
- Let an electronics repair person analyze your device and fix it.
- Remember that, Unwrapping the hardware of the Roomba voids its warranty. So, you should only do this if the contract has expired. If your Roomba device is under warranty, you should go for iRobot customer care.
- Explain to them the situation of your Roomba. Then you should ask them if you’re suitable for a Roomba alternative.
Fix e5 Roomba :
In this section, we have specifically focused on the mechanical buttons, one of the e5 Roomba models. If your device’s clean button cannot return when pushed, this is the perfect guide for you.
This usually happens because the Roomba always is in its previous state. For example, if it was last moved while cleaning, it cannot reset in the new position.
This is most likely inefficient to recognize its placement when set back on the floor. This implies that the “Dock” switch on the Base won’t work.
Here are the ways you should utilize to solve this particular issue:
- First, you should make sure to keep pushing the “Clean” switch for at least 3 seconds. This will be enough to clear the last cleaning job.
- Then, you should manually place the Roomba within six ft. of the Home Base just before docking.
- See If your Home Base is close to any recognized obstacles, the device won’t move if it is.
- Also, ensure that the Home Base setting is without any potential hazards.
- Keep the Home Base at least four ft. Distant from any barriers, for example, stairways. It should also be fixed against a wall surface, such as an open entry point. The Roomba device will enter it after it finishes a job.
- Also, If the Base is situated within eight ft. of a1 Virtual Wall Barrier or any other base, there may be infrared light interference. These items should be shifted out of this 8-foot span.
- Return to the Home Base. If you continue facing issues with your Roomba. Another reason may be a damaged home base trying to reach iRobot Support in this condition.
- Make sure about the correct model of home base for the e5 Roomba. Replacement of the home base is also possible. You can also purchase the same separately from online platforms.
Fix 600 Roomba:
This is here to fix the particular Roomba Clean Button not working on the specific brand Roomba 600. You can also try the steps we provided in the first section. Then you can try the following steps for the Roomba device.
If your Roomba cannot update its system, you might also try to compel update it. The problem arises as you can not manage it to update. But you can do one thing, which makes the Roomba “at rest” to obtain a software update message.
Follow the following steps to do this:
- Port your Roomba to its house Base.
- After that, keep it like that for a minimum of 24 hours.
- You should not forget to ensure that your appliance has a stable internet connection.
If the above process doesn’t help, attempt rebooting. You can also try resetting it to the factory settings of the Roomba. This benefits as it will also help to eradicate any software bugs. It will check any system glitches as well.
Fix 560 Roomba :
In this section, we are here to summarize the helping points for your 560 Roomba model. The steps are removing or replacing a stuck or broken “clean” switch. Here we have provided a much more intensive depth guide of more duration.
But this is why it’s also more helpful than other Roomba 560 instructors. Be ready to replace the top silver cover here to set the control panel that has the button.
- Sensor the lights and shift the Roomba so the cover is facing you. Now you need to use a screwdriver to extract the ten screws on the cover. They can be seen running along the exterior edge of the device.
- Remove the thin topmost cover that holds and covers the device. You have to lift both of them away gently. Move them upwards from the screen to separate these two pieces.You have to remember that wires are attached to the bumper. Therefore, you need to be careful. Take care that they are not damaged.
- Raise the bumper a little so that you can access it easily. Next, remove the two screws that bind the white and red wires to the appliance. The detector can be unplugged which is plugged into the motherboard. This will ensure that the armor is not dropping off the Roomba.
- Lift the black circular panel away from the lens. Also, lift the apparent lens on the other side of the armor. You have to restore it with a fresh lens.
- Next, you must rotate the device in front of the vacuum bin. Push the switch of the vacuum container. Then, pull out the vacuum bin from the Roomba.
- Unhook the clasps that are between the silver board by your hands. You have to unhook the clasps keeping them in place. Use the plastic removal tool and go in the external rims of the silver board.
- Raise the silver cabinet off of the main panel. Hold the black handle and lift it. You can use the plastic removal tool to loosen the clasps underneath it. Utilize the same to poke the silver board from the central black control board.
- Utilize a screwdriver to open the following bolts. These are two 7.5 mm-sized bolts at both ends of the handle. Then Ten five mm-long bolts and a 5 mm bolt under the central board.
Now, remove the blackboard from the gadget.
- Turn the device upside down. Here you have to remove the 5 mm screw on the side that is a yellow sweeper. Now you have to remove the yellow sweeper side.
- Utilize a screwdriver, and unscrew the four 10 mm bolts that keep the back cover in place. You need to Hold up the rear panel to replace it from the Roomba.
- Now elevate the yellow battery by peeling off the green tags on its side. Next, you need to remove the outer silver circle and black cover. Also, remove the black film in the main control panel in that order.
- Now grab a screwdriver, and remove the four 10 mm bolts around the clean button. Eliminate the upper part of the control panel. Turn the control panel over now. You also need to unscrew the two that are bottommost screws.
- Finally, hold up the button, and replace or repair the damaged plastic part of the “clean” switch.
Final Talk
In the last section, we advise you to clean your Roomba parts regularly. Since many problems arise from dirt in the button spaces of charging connections, cleaning can prevent them.
In this article, we have seen many more reasons than we could think behind the simple-looking problem.
Not hesitating to reach and let professionals do their job is also important in some cases. But we now know by this guide you can fix many problems with the proper guidance. Also, have you tried connecting your Roomba with Homekit?


Leave a Reply