The problem of the Honeywell thermostats not working after battery change is frequent and very common. If you facing the same. We got this guide for you. This will talk about possible issues that can cause hindrances in Honeywell Thermostats.
Method To Fix Honeywell Thermostat Not Working After Battery Change
Quick Navigation
The problem you are facing is not new. Honeywell thermostat is quite popular in having issues after battery replacement. The working battery goes for 1 -2 years.
The problem arrives even when you have placed the battery correctly. Yes, this is frustrating, but the problem comes with a solution always. Follow the steps mentioned below and get your comforting thermostat back to work.
1. Check If You Are Using the Right Battery

If your Honeywell thermostat still does not work, you may be using the wrong batteries. The fresh batteries in your thermostat may not be enough to keep it running.
Go inside the battery compartment to determine which boost converter your batteries require. For example, 1.5V AA batteries primarily power them. Batteries should be non-rechargeable.
While getting the necessary batteries, make sure they are of good quality. Poorly made batteries can cause the same concern. Instead, check that the batteries are active and buy high-quality batteries.
2. Replace Battery
If you don’t replace all batteries at once, the thermostat may stop working correctly. Therefore, it’s better to keep new and old ones separate.
For example, replace the batteries in your temperature controller every year with new ones. If the charge levels of the old and new batteries differ, your thermostat may malfunction.
Using both(new and old) batteries simultaneously may result in battery leakage. It results in decreased overall performance.
If your thermostat batteries are low, replace them all for optimal performance. Get strong batteries for your thermostat.
3. Battery Should Be Properly Installed
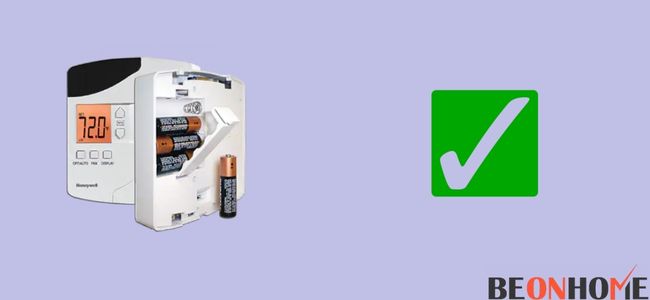
Sometimes it is neither the quality nor the charges that cause this problem. Instead, it is your placement that is creating the issue.
We often install the batteries without checking the positive-negative in the battery compartment. Instead, look in the box, whether both they should face a similar direction or a different one. You should fulfill the required orientation.
4. Factory Reset
Before moving forward, ensure that you have no problem going for the reset. This will remove configured settings and return the thermostat like it was earlier. It is a straightforward approach and can be helpful in various situations.
Please note: Write down or recall the settings in use beforehand.
Let us look at these steps:
- Step 1 – If appropriate, turn off the thermostat.
- Step 2 – Unlock the door to the battery compartment. Insert a small object into the slot, then flip the chamber door open to release it.
- Step 3 – Remove the battery and insert the new ones. Ensure placing the battery in the wrong manner and on opposite poles.
- Step 4 – Let it stay for 5-10 seconds and remove it again.
- Step 5 – Insert the battery in proper orientation now. Your device display will start working.
- Step 6- Slide in the cover at the back firmly. Your device has taken control now.
Factory reset methods for T5+, T5, and T6 (models of Honeywell thermostat)
- Step 1 – Check if your device is turned on and ready to use.
- Step 2 – Press and hold the Menu button for a couple of seconds.
- Step 3 – Choose “Reset” from the left-hand menu.
- Step 4 – To choose a factory, click “Select.” A Message comes up saying, “are you sure?” it will prompt.
- Step 5 – Tap yes, and your device has been reset completely.
Lyric and Smart Round Thermostat.
Another very frequently used design is called the Smart or Lyric round thermostat.
We are putting the steps to resetting of this thermostat below:
- Step 1 – Hold down the Weather button until the Navigation button appears on the screen.
- Step 2 – Navigate to Factory Reset by scrolling down until you see it.
- Step 3 – Once you do this, click “Ok” and “Yes.”
The device gets reset. It gets restored to the setting it was like when you bought it.
5. Break the circuit
This process is worth a try if nothing works out for you. Break the circuit by sliding the MCB downwards. Wait for a few seconds and put it back on. This is the main distributing panel in your home. You will have to look for the thermostat breaker to push it down.
6. Clean the Terminal
If the old batteries have rusted the battery terminals, your thermostat may not turn on. This issue occurs because the current is not passing through. In addition, poor seals of batteries spread acids all over. Dip a Q tip in citric juice and rub gently.
7. Contact Honeywell Support.
The last resort should be contacting Honeywell support. It indeed requires patience because the call center official will schedule a visit. They may even ask to guide you on call, but with more wait time.
Professional help is your last option because you have tried all the processes. They have the right expertise and proper tools to take your concern forward.
Display Not Working After Battery Change

Troubleshooting will be required in this section as well. So go ahead and check which step solves your problem.
Fix Honeywell Thermostat Display Not Working After Battery Change:
1. Wrongly placed batteries
As we have learned in the sections above, we face a problem when placing the battery in the wrong position.
Re-check the battery compartment to have a look at marker signs quickly. Put the batteries as mentioned, and your issue will no longer trouble you.
2. Strong Batteries
The problem can resurface if the batteries are not vital to hold up the power needed. The manuals guide you on the quality and brand of the battery for efficient functioning. It is either AA or AAA batteries in Honey well thermostats.
3. Reset the Thermostat
Read through the factory reset option mentioned above and conduct the process. Ensure all the steps are followed. The display will come back as soon as you finish restoring the factory setting.
4. Wiring
It can be one or many wires to cause the problem. So first, check for cables all over the equipment and terminals inside. These cables should be intact and firm in their position. Once you ensure this, the problem goes away.
Things to look for
- Check that the wiring is not tilted or has stumbled out of place.
- Make sure that no bare wires are in contact.
- Examine the wiring for any loose or incorrectly placed wires.
5. Furnace Door
It is critical to ensure that you have closed the furnace door. Ensure that there are no gaps between the switch and the door.
6. Circuit Breaker
If your fuse blows, the circuit breaker trips because of the overloading. So we recommend changing the fuse and checking if the problem persists.
7. Contact Support
The thermostat itself may be the source of the problem in some cases. You’ve exhausted all options, and none seem to be working. It’s time to contact Honeywell customer service.
Getting customer service will assist you in obtaining the necessary information. Sometimes you can solve the problem entirely online or through a call. Others may send expert technicians to your home who troubleshoots the problem.
Heat Not Working After Battery Change
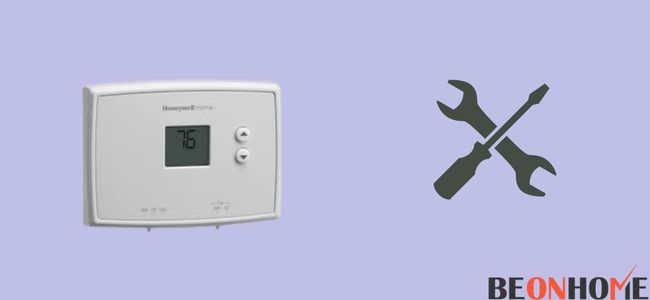
You do not see these issues that frequently. However, it has arrived, and you may need expert help. Whether or not to take help is a tough choice to make, and we can help you make a choice.
Fix Honeywell Thermostat Heat Not Working After Battery Change:
- Check the vents for airflow.
- Examine the whole furnace system.
- Check the wiring of the Honeywell thermostat.
- Check the screen of the Honeywell thermostat.
To begin with, start with the familiar steps first.
Step 1 – Reset the whole thermostat.
This process is listed above for you to follow. Many problems will be solved using this process.
Step 2 – Circuit Tripped.
If the circuit is in the off position, switch it on. The power will reach the thermostat, and it will start to function.
Step 3 – Furnace On and Cover Closed.
Needless to say, the furnace should be on. In addition, the breaker should be in the on position, and the door of the furnace to be closed.
Step 4 – Improper Installation
The installation is the most crucial part of the whole system. Ensure the process is apt and placement is accurate.
Step 5 – Faulty Sensor
Check the temperature of the room and the temperature that the display is showing. The sensor, if faulty, should be replaced.
The problem you are facing needs an expert’s help. Call up customer care and see what they have for you. This step will be your last resort. You should always go for a high-quality battery-powered smart thermostat for multiple zones to avoid these kind of hassles in future.
Final Talk
This article helped you fix some recurring problems in Honeywell Thermostat. It showed why the issue came up and what to do to solve it. We also talked about the display failure and heat problems and ways to solve them. Also, do check out an excellent battery-powered thermostat for your Airbnb.


Leave a Reply